

Of all the features available within Microsoft Excel, the AutoFill tool has to be high up on the list of those used most frequently. Often though the AutoFill feature is underutilised and users do not know the full potential of this nifty little tool.
In this post, I will give you an introduction to the use of the AutoFill feature.
What is it?
Let’s have a quick overview of what the AutoFill tool is capable of and then we’ll dive into its actual use. Essentially AutoFill can be used for copying of a pattern or formula. Most users would be familiar with the ability to copy a formula down rows or across columns which is a great time saver and removes the need to create a formula multiple times.
What some users may not be aware of is the ability to use the AutoFill tool to replicate patterns in both text and numbers. Let’s take a look at how this tool can be used to copy a formula and a pattern.
To use the AutoFill tool, follow these steps:
- Open Microsoft Excel
- Open an existing workbook containing data suitable for this exercise or create a quick exercise file as shown below
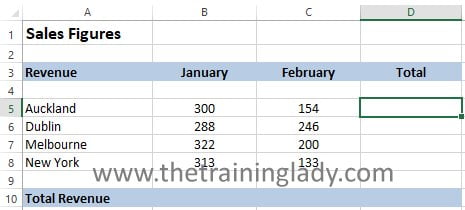
- Create a formula in cell D5 or in an appropriate cell in your own workbook to perform a calculation, I have just used the AutoSum function:
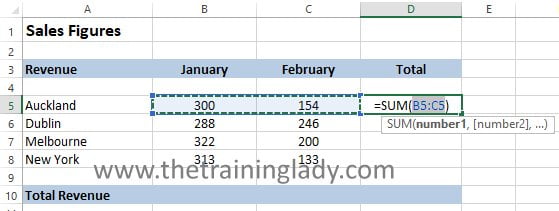
- Now we will use the AutoFill handle to copy this formula down to the rows beneath
- Select the cell which contains the formula you wish to copy
- Place your cursor over the bottom right corner of the cell where the small square is displayed. This is where you will need some precise positioning of the mouse so that you do not accidentally select a different action such as moving the content
![]()
- Ensure your mouse cursor turns into a black cross
![]()
- Hold down the left mouse button and drag the cursor down over the cells you wish to copy the formula to, you will see a border displayed around the cells you are copying to
- Release the mouse button
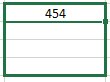
- The formula will now be copied to the cells you selected and Excel will automatically adjust any relative cell references accordingly
- Congratulations, you have now used AutoFill to copy a formula
Create a pattern
AutoFill can also be used to create a pattern within your workbook. A great example is the months of the year and days of the week. Excel automatically recognises these and can add these into your workbook using AutoFill. No more typing these manually!
- Open a new blank worksheet
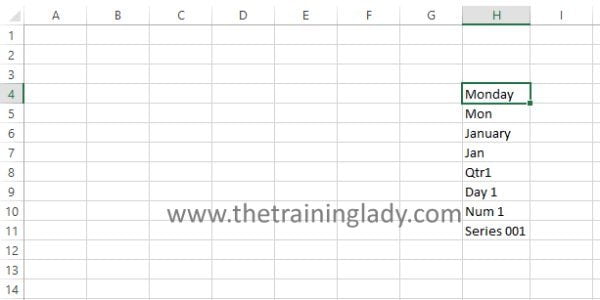
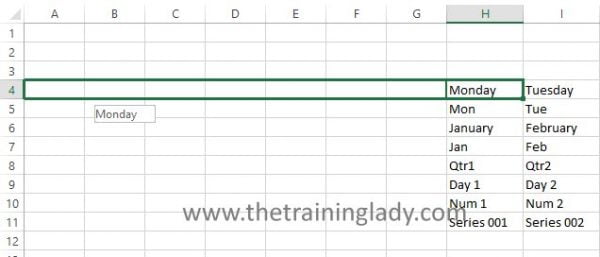
- In cell H4 add the following text:

- Select cell H4 with the word Monday
- Use the AutoFill tool and copy across to cell N4
- The days of the week will now be filled in for you
- Repeat this process for row 5 to 11
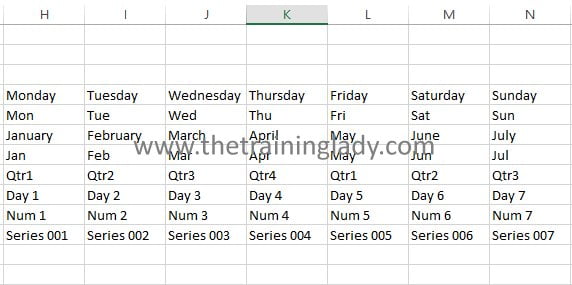
- You will notice that Excel recognises both the full-text version for the days of the week and months of the year as well as the abbreviated versions
- You will notice that Excel recognises that there are only 4 Quarters and will restart back at Qtr1
- You will notice that Excel recognises that Series 001 is a pattern and will number the series sequentially
Tip: Often during training courses, participants will try to create some more complex patterns and see if they can catch Excel out. You may find when creating custom patterns of your own that you may need to create the first 2 or 3 entries so that Excel can identify the pattern and recreate the rest for you. If you are creating a pattern of your own, highlight the first few entries before using the AutoFill tool so that Excel can see where your series begins.
- Did you know that AutoFill works backwards? Repeat the above process however use the AutoFill tool and copy to the left instead of dragging to the right. See.. there was a reason I had your data start in column H.
- Excel will copy the patterns backwards
- Well done, you have now used AutoFill to copy a formula and create a pattern.
In future posts, I will show you how to create growth patterns where numbers increase by specific values, use AutoFill for date functions and also how to create your own custom series. For more Excel content click here.


