

In 2021 I had the pleasure of presenting at the Leading a Digital School Conference and showing attendees how to use Microsoft Sway. To provide participants with some additional resources I have published a series of posts which contain information from my sessions along with some tips and tricks.
As mentioned, this session looks at using Microsoft Sway. This will be my first blog post relating to the Sway product but it’s a fun program to work with so let’s get started.
What is Microsoft Sway
Microsoft Sway was released in 2015 as a new application to provide users with a way to create and share presentations, newsletters, stories and presentations. Sway is very content-centred meaning you can take away the need for all the bells and whistles you can get from other programs such as PowerPoint, and solely focus on the content and the story you are telling. Sway includes a built-in design feature which lets you very quickly style your presentation without the need to sit for hours to make it look polished.
Microsoft Sway works perfectly within a classroom or business setting and really has no limitation in its application or usage.
Launch Microsoft Sway
There are two ways to use Microsoft Sway. Firstly there is a desktop app you can install and use, or you can log in to the online portal and work via your web browser.
Install the Sway app
The Sway app is available through the Microsoft Store. If you are using an Apple or Android device, there is no compatible app so you will need to access Sway through your web browser, see the next section. To install the Swap desktop app, follow these steps:
- On your computer, click the Start button and locate Microsoft Store
- Once the Microsoft Store is displayed, click inside the Search button in the top right corner and type Sway
- From the results locate the Apps section and Sway will probably be the first app listed
- Select it to view more details and then click the Get button
- Sway will now be installed to your computer
- Once the installation is completed, click the Launch button. Alternatively, you can locate the Sway app in your Start menu
- The Sway start screen will be displayed
Use Sway through your web browser
If you prefer to work through your web browser, follow these steps:
- Open your preferred web browser
- Enter the address https://sway.office.com/ and hit Enter
- Click the link to log in using your Microsoft account
- The Sway start screen will be displayed
Personally, I prefer to use the App but having access to the online version is great when I’m away from my computer.
Create your first Sway
Microsoft Sway works off two main elements: the Storyline and Cards. The Storyline represents the sequencing of your information whilst cards are the different types of elements you can include.
So let’s create a Sway from scratch.
- From the Sway screen click Create New
- A new Sway will be displayed with a Heading card already displayed
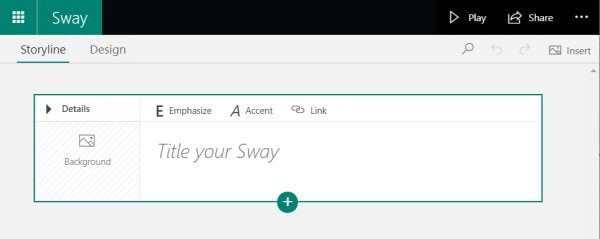
- Enter a Title for your Sway
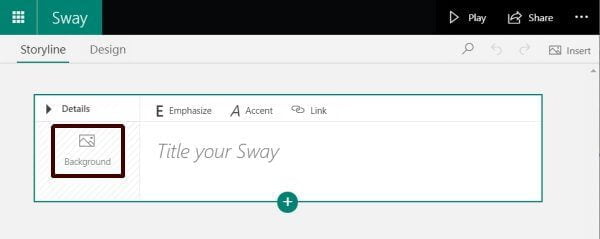
- If you would like to have an image displayed behind your title you will need to add a Background to the Heading card
- Click the Background image button within the Heading card
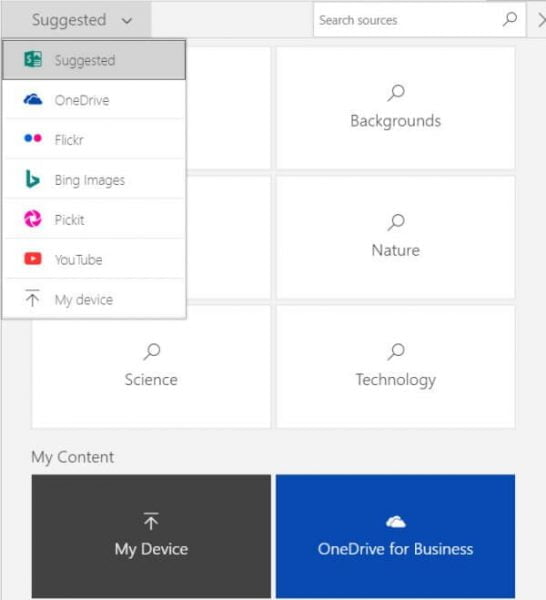
- Options will now be displayed for you to add images. Use the Suggested drop-down menu to search specific sources or use the My Device option at the bottom to upload content from your own computer
- Once you have added an image into the Heading card background, it should be displayed on the card
Create a Text card
Now that you have your Heading card set up, let’s create a text card to add some content into the Sway.
- Click the Insert Content button at the bottom of the first Heading card
- From the card options, select Text
- A Text card will now be displayed
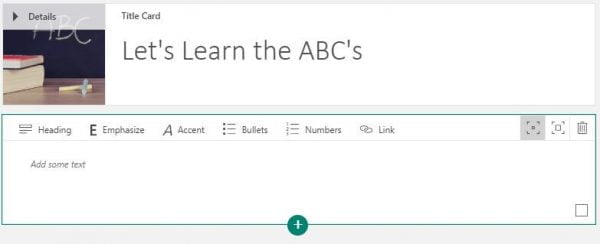
- Place your cursor inside the Text card and add content you wish to display in the presentation
- You can switch the card to a Heading card by clicking the Heading button in the toolbar. Use the Emphasize and Accent buttons to apply additional formatting (dependent on which style you choose later). Use Bullets and Numbers to display lists or instructions. The Link button will allow you to add a hyperlink with a text placeholder.
- On the right side of the Text card toolbar you will see three buttons: Subtle, Moderate and Delete
- The Subtle and Moderate buttons allow you to change the sizing of this card within the presentation whilst the Delete button allows you to obviously, delete the card.
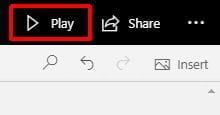
Preview your Sway
To see what your Sway presentation looks like after making additions or edits, click the Play button on the top menu bar.
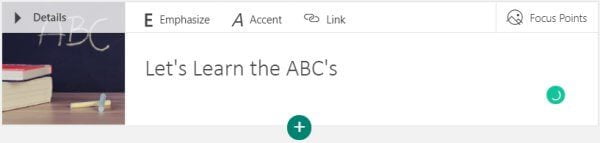
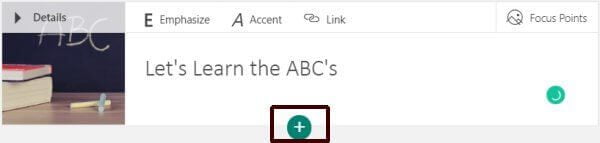
Add an Image card
Now I’d like to add some images that will illustrate the content in my first Text card. My sample is about learning the ABC’s so I’ve created a card to represent the letter A so now I’d like some images of things that start with A.
- Hover over the Text card and click the Insert Content button (+)
- Select Image from the options
- The Image card will be displayed
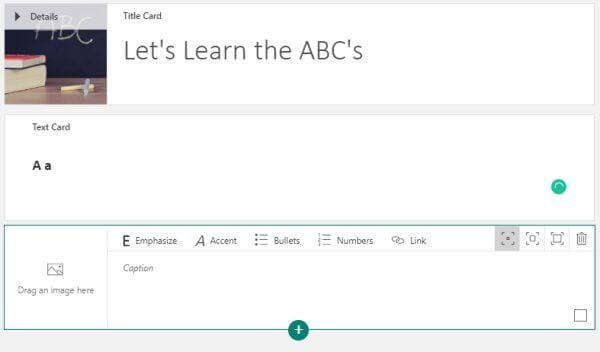
- You will also notice the side panel pops open to allow you to search for images using the Suggested sources just as it did when we added the background to the Heading card.
- I am going to upload images I have saved to my computer so I will click My Device from the options
- Locate and select the image you wish to upload
- Repeat the process and add two more images you would like to illustrate your first text card
- I now have 1 text card and 3 image cards
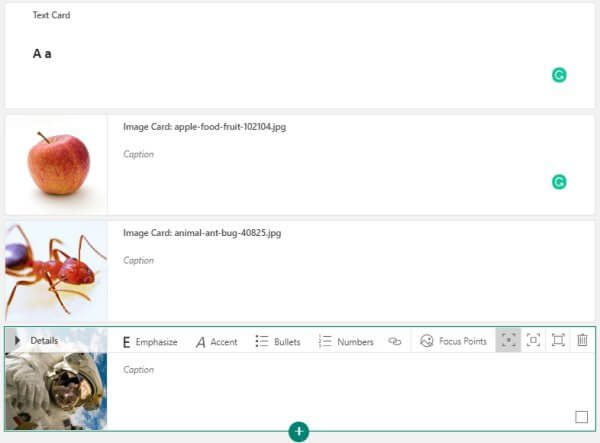
- Click Play to preview your Sway presentation
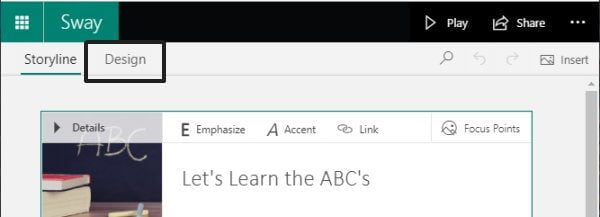
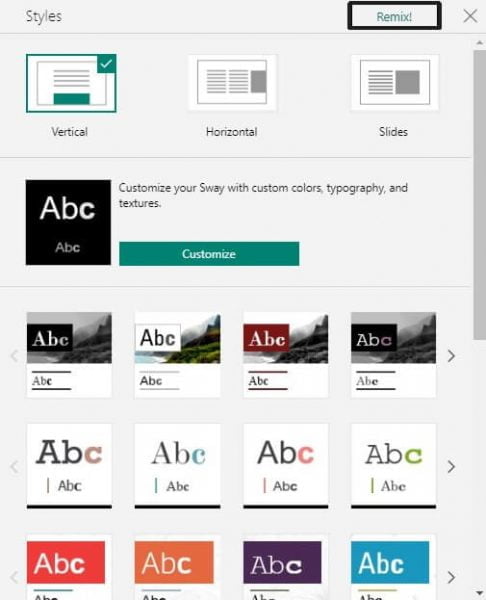
Style your Sway
One of the awesome parts of creating with Sway is that fact you don’t need to spend a huge amount of time trying to get the styling of your presentation right. Sway has a built-in style gallery which lets you easily switch between the different styling options until you find the way you like.
- From the Storyline view, click the Design tab
- Now click the Styles button from the right-hand side
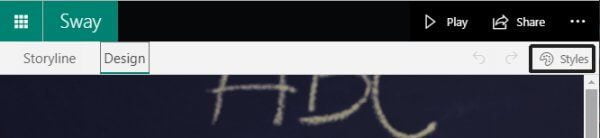
- From here you can now select if you want your Sway to scroll vertically, horizontally or as slides
- You can also see the available style options
- Each row displayed a core style set with variations such as fonts and colours
- If you are feeling adventurous, click the Remix button and Sway will pick a style combination for you and display your Sway using the styling
- Keep clicking the Remix button till you see a style you like
Share your Sway
Once you are happy with your Sway you are ready to share it with others. You have the option of sharing only within your organisation or school, specific people or groups or open it up for anyone to access your Sway.
- From your Sway, click the Share button on the main toolbar

- Select who you want to share your Sway with from the options provided
- You can select if you want people to be able to view or edit your sway
- Copy the Link provided and paste this into an email or your preferred method to share this link
View my Sway presentation
I have created a simple Sway presentation showing you some tips on how to use Sway. A Sway on Sway if you will.
Click the link to view my How to use Microsoft Sway presentation.
Password protect your Sway
If you would like to see how to password protect your Sway, check out my article here.
Congratulations on creating your first Sway presentation. I hope this has given you a basis to start from. Be sure to watch out for more posts on using Sway. Click the following link to view more of my presentations from the Leading a Digital School Conference.


