

Microsoft Outlook has the ability to be able to set up rules that allow you to create an action that Outlook will make on your behalf. Rules can be a great method to assist you in managing your incoming and outgoing email and can be a huge time saver!
You can apply rules for:
- Emails you receive or send
- Moving emails from specific people or with specific words in the subject
- Flag messages from specific people
- Play a sound when mail arrives from specific people
- And much much more…
Let’s say for instance you are working on a project with two colleagues and whenever you receive an email from specific suppliers who are part of the project, you want those emails to automatically be forwarded to your colleagues so they are able to keep up to date with what is happening. Rules within Outlook will allow you to do exactly this.
In our example today I’m going to show you how to create a rule that will forward emails received to a colleague.
Create a rule
To create a rule, follow these steps:
- Open Microsoft Outlook
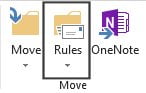
- From the Home tab on the Ribbon select the Rules button within the Move group
- From the drop-down menu choose Manage Rules & Alerts
- The Rules & Alerts window will appear:

- Click the New Rule button
- The Rules Wizard will now begin
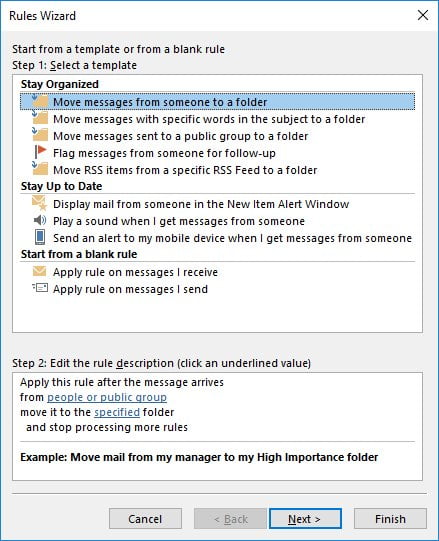
- You will now see Step 1: Select a template
- Outlook includes some pre-defined template rules that are already setup and allow you to just customise the necessary sections and then they are done. This makes rule creation really quick and straightforward. If you want to create a rule from scratch you can still do that using the last two items listed under the Start from a blank rule category
- Whenever I show people how to create rules I always say that the best way to understand a rule, is to read them like a story. The bottom half of the Rules Wizard dialog box shows the Step 2: Edit the rule description area. Here is where you can read the rule, just like a story and as you change or select options the story will grow.
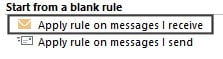
- We are going to create our rule from scratch using a blank rule so select Apply rule on messages I receive and click Next
- Now you will see at the top of the wizard the question: Which condition do you want to check? Essentially Outlook needs to know what condition or criteria it needs to look for:
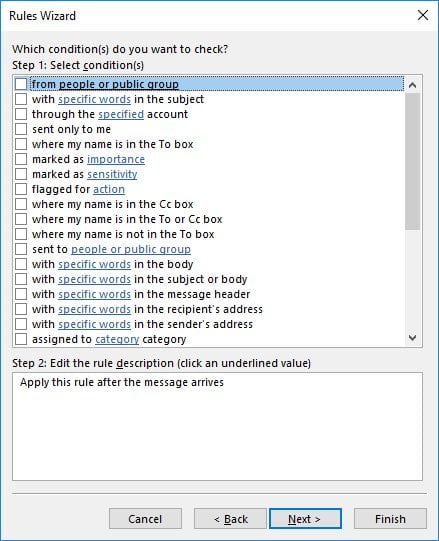
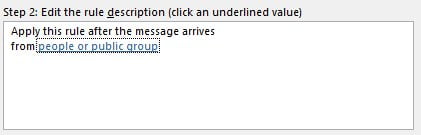
- Because we want to forward an email to a colleague from a specific sender tick the box for the from people or public group option
- You will see the Step 2: Edit the rule description area at the bottom of the window has now added that criteria to our “story”
- Anytime you see words with the blue underline, exactly like a hyperlink, click on it because it allows you to specify that part of the rule
- Click on the words people or public group displayed in the Edit the rule description area
- The Rule Address dialog box will appear allowing you to select a person from your contact list
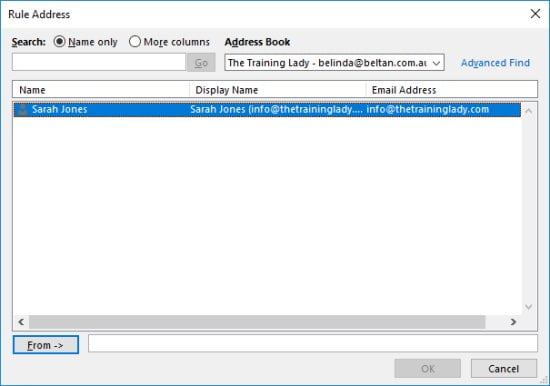
- Double-click the name of the sender from your contact list and ensure their name appears in the bottom section in the From field
- Click OK
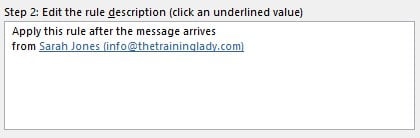
- Your rule should now be starting to take shape
- Click Next
- Now you will see at the top of the wizard the question: What do you want to do with the message?
- From the options available tick the box to forward it to people or public group
- This option will now be added to your rule at the bottom of the window
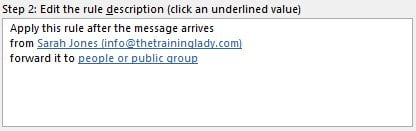
- Click the link for people or public group
- Now browse your contacts and select the colleague(s) that you want emails from this sender to be forwarded to
- The rule is almost done

- Click Next
- Now you will see at the top of the wizard the question: Are there any exceptions?
- For this rule, we won’t need to implement any exceptions so just click Next
- The final part of the rule will now ask you to give the rule a name and you can also specify a few options

- For the Step 1: Specify a name for this rule, make sure you give it a meaningful name such as Forward emails from Sarah Jones to David Smith
- You have the options to run the rule on email already in the Inbox, if you wish to do this just tick the checkbox
- Ensure the Turn on this rule box is selected so this rule will be enabled and applied to all new incoming email
- Click Finish and click OK on the Rules and Alerts window
- Your rule is now finished and should begin to work
- When the next email arrives from the specified sender, Outlook will automatically forward it to your colleague(s) and a copy will be visible in your Sent Items along with the Forward icon displayed on the email message in your Inbox
Enjoy using Rules in Microsoft Outlook! If you enjoyed this post you may also find the following posts useful to keep your Inbox organised and tidy.
If you have any questions about creating rules or how to achieve a specific task do not hesitate to contact me.


One Response
I’m trying to create a rule with something specific in the subject line and then forward the email to 2 persons. Sounds simple but it doesn’t work.
Apply the rule after the message arrives
with 99 in the subject
forward it to susan and allan