

This post is written using Microsoft PowerPoint 2010. For steps on how to achieve this using Microsoft PowerPoint 2016 please see this updated post.
This week I saw a great question on an online forum relating to Microsoft PowerPoint. The question asked how to make an object appear on screen for a few seconds, and then make it disappear only to be replaced with a different object. I’ve been asked about this one many times during training courses and it really is a nice easy task to do, so after answering the question I thought I’d create a post about it.
Using Animations in Microsoft PowerPoint can be lots of fun and allows the creative juices to flow. Having conducted professional development for teachers over the years there are some really great ways that teachers and students can use PowerPoint and in particular, animations in the classroom.
About Animations
Animations are a great way to make any presentation interactive and dynamic. There are four (4) different types of animations: Entrance, Emphasis, Exit and Motion Paths. The type of animation you decide to use is directly related to what you want the object to do. Do you want an object to appear or disappear? Then you will need an Entrance or Exit effect. Do you want it to be highlighted or accentuated on the slide? Then you will need an Emphasis effect. The Motion Paths effects provide great flexibility to essentially do whatever you want including making a turn, looping and creating your own custom path.
There is such a thing as “too much of a good thing” when it comes to animations. I can definitely say that I’ve seen some terrible examples of how to use animations in Microsoft PowerPoint. While it is a great feature, I always give this little “disclaimer”. While animations can really improve the readability and retention of information, too much will make your audience feel like they are watching the latest creation from Disney Pixar. Too much is never good, so try to keep the number of things or text you animate to a level which will not leave your audience looking confused wondering where the next piece of information is going to fly from.
About the Animation Pane
The Animation Pane allows you to view all objects on the slide which have had an animation effect applied. I find the Animation Pane gives you a better view of what is animated and when it will run and is great for troubleshooting issues. In order to see the Animation Pane on screen, you must click a button for it to be displayed. I’ll show you how to do this a little further down this post.
Let’s get started
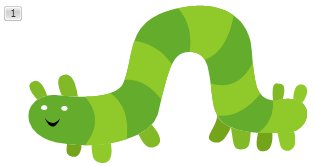
For this animation sequence, I am going to have an image of a caterpillar turn into a beautiful butterfly, this is inspired by my daughter’s recent “life cycle of a butterfly” presentation she did for news.
So let’s take a look now at how to work with animations in PowerPoint to achieve our goal.
- Firstly lets open Microsoft PowerPoint
- Whenever I conduct a course in PowerPoint I always emphasise the importance of choosing the correct slide layout so for this animation sequence I need a blank slide
- From the Home tab click the Layout button and choose Blank from the options

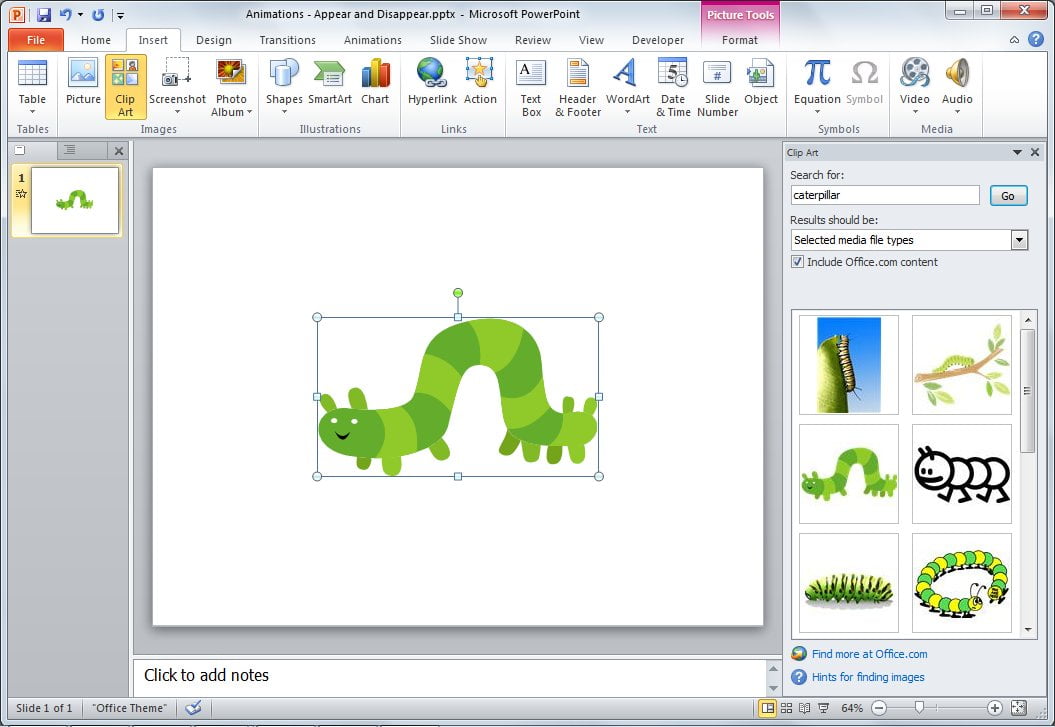
- Now we need to insert our first image which will be a caterpillar
- Select the Insert tab and click the Clip Art button
- The Clip Art task pane will appear on the right of the screen
- In the Search for field type caterpillar
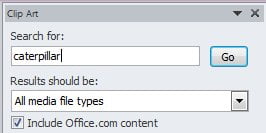
- Let’s be specific about the type of media we are looking for, performing this extra step can mean less time to scroll through the results looking for what you want, I’m all for efficiency!
- Click the Results should be drop down menu and select only Illustrations and Photographs
- Make sure the Include Office.com content checkbox is selected so that your search results will include clip art available through the online content and not limit you to only what is loaded on your local hard drive
- Now click Go
- The clip art images will now appear:
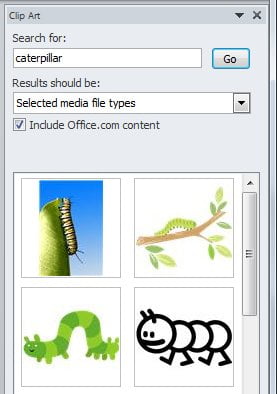
- Insert the caterpillar image you wish to use by simply clicking on it once with the left mouse button
- The caterpillar will now be displayed on your slide
- Now to insert the butterfly
- Repeat the same process but perform a search for butterfly
- Once you have the butterfly on the slide move the butterfly off to one side of the slide by simply clicking and dragging the image
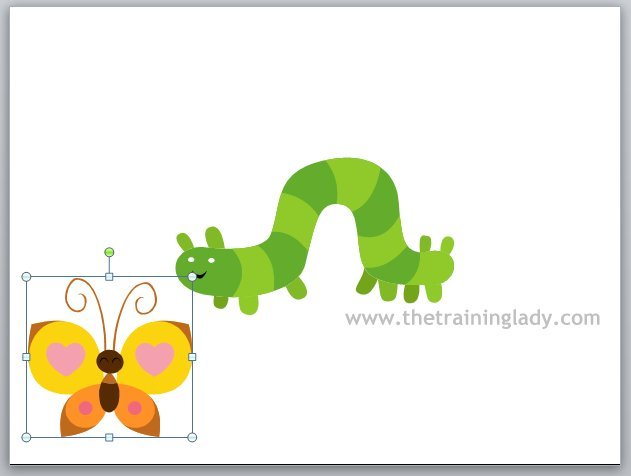
- The reason I suggest you move the butterfly to one side at the moment is to make setting up the animation sequence a little easier, at the end we will move the butterfly over the top of the caterpillar and increase the size
- You can close the Clip Art task pane by clicking the small X at the top of the pane – be careful not to close the main PowerPoint window
- Now select the caterpillar and click the Animations tab
- To display the Animation Pane click the Animation Pane button located in the Advanced Animation group
- The Animation Pane will now display on the right side of the slide
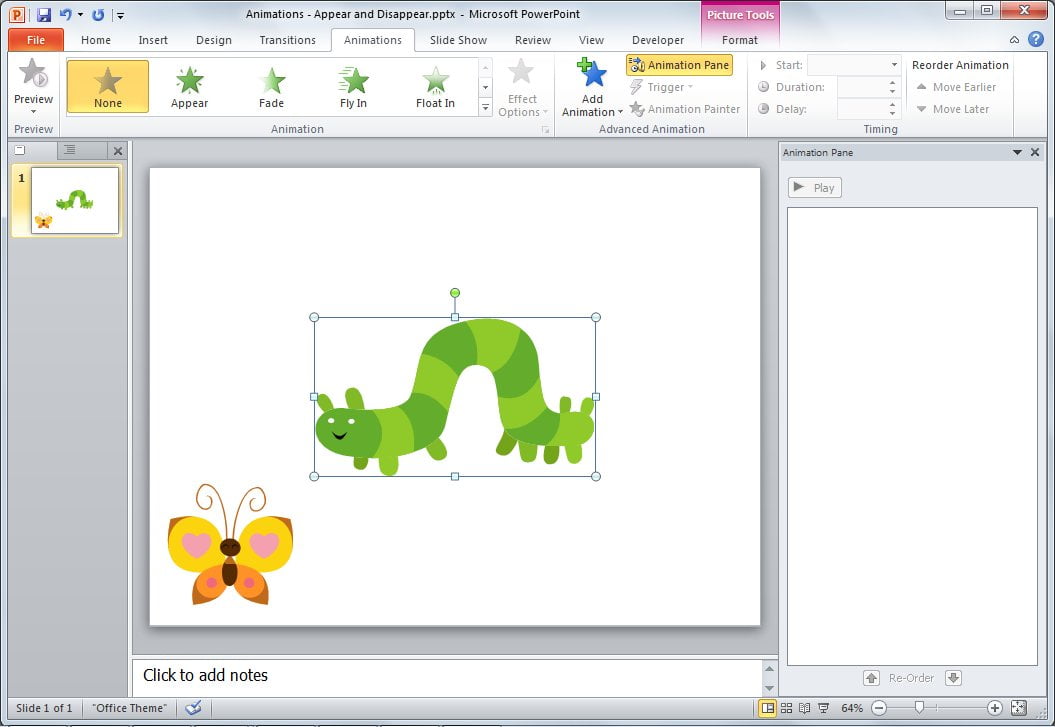
- For the caterpillar, we want to make him disappear
- From the Animation gallery select the More button which is underneath the down scroll arrow
- From the list of available animations scroll down and click the Disappear option
- You will now see the number 1 appear in a square on the top left corner of the image
- The number helps us identify objects in a sequence, so this lets us know this animation will run as the first item in this sequence. It’s important to note that if you set multiple animations to run at the same time that they will all be numbered the same instead of numbered individually
Timing
Animations all rely for the most part on the timing settings. Timing includes us specifying when an animation should begin, how long we want it to last and if we want any delay used.
When it comes to the Start option you have 3 available:
| On Click | Will begin any animation sequence once the mouse is clicked or a key pressed on the keyboard whilst in slideshow mode. |
| After Previous | Will begin once any previous animation effects have completed. Starting slideshow mode is also considered a “previous” effect. |
| With Previous | Will begin at the same time of any previous animation effects. Starting slideshow mode is also considered a “with previous” effect. |
- For this animation we want this to run without us having to prompt it to begin, so click the Start drop-down menu from the Timing Group and select After Previous
A common question I get at this stage during a training day is “Why are we using After Previous when this is the 1st item in this sequence?” That is a valid question and as I’ve outlined in the table above, PowerPoint recognises that when we start a presentation in slide show mode that is the “previous” effect so it will automatically start an animation without us having to click.
- For the Duration option we need to set how long we want the animation to take, so in this case, how long till our caterpillar disappears?
- Use the up and down arrows to adjust this setting to 3 seconds
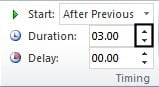
- For this sequence, we do not want to use a delay
- Now select the butterfly image
- From the Animation gallery, click the More button and select the Appear option
- Within the Timing section change the Start setting to be After Previous because we would like to butterfly to appear once our caterpillar has disappeared
- Now in the Duration section, we can leave as the default option of Auto. This will essentially leave the butterfly on the slide till we either move to another slide or exit the slideshow. If you wanted to include a 3rd or 4th animation then you would set this option to the number of seconds you want the butterfly to be displayed
- Now that both images are animated, click and drag the butterfly over the top of the caterpillar and make the image larger

- We are now ready to preview our animation
- Click on the first object in the Animation Pane, in our case it will be the caterpillar
- Now from the Animations ribbon click the Preview button which is on the far left on the ribbon
- You will now see a preview
- To view the full animation in slideshow mode simply press F5 on the keyboard and sit back and watch
- Once the animation has finished click Esc on the keyboard to exit
- You have now created a simple, but effective, animation in PowerPoint
I highly recommend you explore the animation options available and of course, if you have any issues or need assistance do not hesitate to contact me via the Contact Me page or via Facebook or Twitter. Enjoy.


