

In an earlier post titled Backing up your files – a vital step to securing your data, I outlined the basic information needed for any user to begin the process of backing up data on a regular basis. In this post, I will step you through how to perform a back up using the Backup and Restore. This utility is provided in Microsoft Windows 7 and above.
Launch Windows Backup and Restore
- Click on the Start button and then select the Settings button

- Select the Update & Security icon
- From the side menu bar select Backup
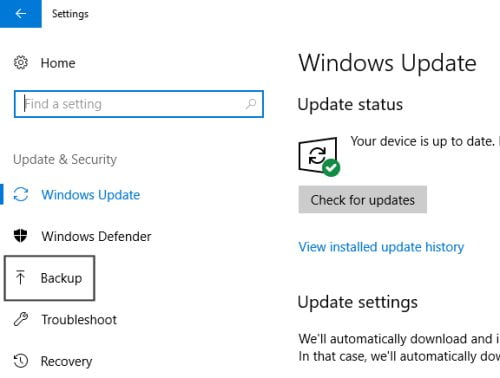
- Under the Looking for an older backup heading, click the link to Go to Backup and Restore (Windows 7). This utility will safely work if you are using Windows 8 or 10 without issue.
- You will see the message: Windows Backup has not been set up
Create a new backup
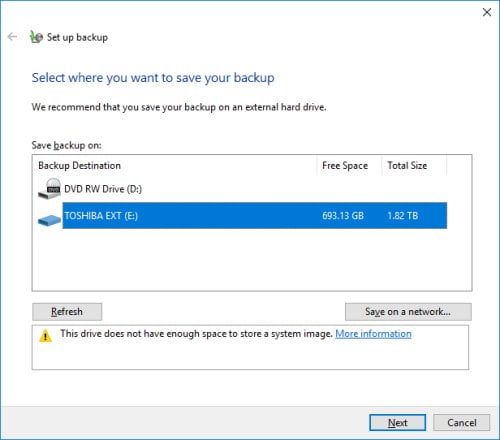
- To begin, click the link on the right to Set up backup
- A dialog box will appear which will guide you through the process of configuring your back up
- First, select your external hard drive from the list provided, then click Next
- Now you will need to select what you want to be backed up. The default option is to Let Windows choose however if you want to be specific and include custom folder locations. Select Let me chose and we will now look at how to select your own folders to back up. Click Next.
- Windows will identify that it is going to back up all users Library folders. This will include the Documents, Pictures, Music, Video Libraries. Locations such as the Desktop or Favourites are all included in the Additional Locations section. Remember to also include any custom folder locations for any custom software you have installed such as accounting software, or custom folder locations which may contain email files etc.
- You will notice at the bottom of the dialog box you have the option to Include a system image of drives. Leaving this option selected means that a copy of your system drive will be taken allowing you to restore your computer back to its current system state should any hardware fail. Without a system image, you have to manually install the operating system, all updates, and all programs you have installed plus any devices such as printers or scanners.
- To save on my backup size I am going to uncheck the Include a system image of drives option
- Now click Next
- You will now be shown a summary of your backup information
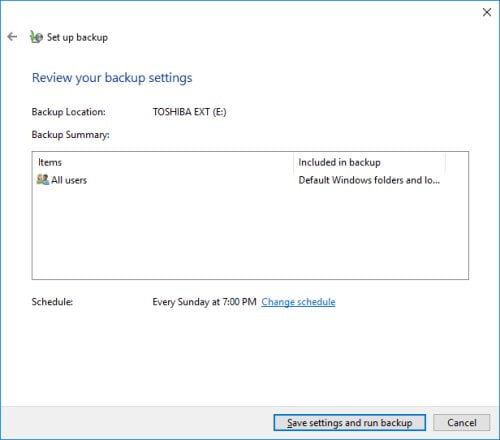
Select a schedule
- You will see a Schedule has been suggested. If you want to change this schedule click the link for Change schedule
- If you do not want to run your backup on a regular schedule then uncheck the option for Run backup on a schedule

- I highly recommend you choose a schedule to run on. Select a day and time that you know you would usually have your computer on but may not be working on anything important, or set it for a specific day & time and try to ensure you always have your computer on and ready so the backup can run without interference.
- Click Save settings and run backup
- The backup will now begin
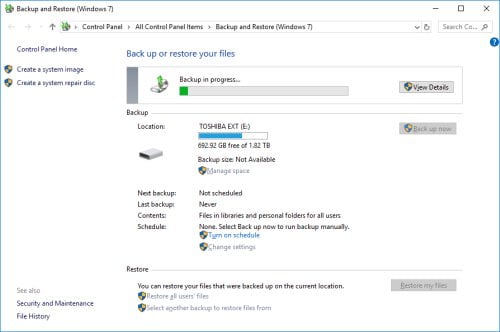
- Allow your computer to complete the backup process
- You can now close the backup utility window
- If you have set a schedule you do not need to make any further changes, just let the back up do its thing. Be sure to check in occasionally to make sure it is completing successfully.
For more information relating to back up of data, be sure to check out: Backing up your files – a vital step to securing your data to identify other methods you can use to back up your data. You may prefer to use the Back up using File History option available in Windows 10, or back up to a cloud-based storage solution.


