
In recent versions of the Microsoft Office programs, users now see a Start screen appear when any of the programs are launched. This Start Screen gives you quick access to various functions such as any recent files you have opened and the ability to choose a new blank document or file or various templates which may be available.
For some users, the preference may be to skip this step and go straight into the application and begin working immediately whilst others are happy with this new way of opening programs. If you happen to be one who prefers to jump straight in and get working, then here I will show you how you can turn off, or disable the Start Screen from appearing at startup within Microsoft Excel, PowerPoint and Word.
To disable the Start Screen, follow these steps:
- Open Microsoft Excel, PowerPoint or Word
- The Start Screen will be displayed
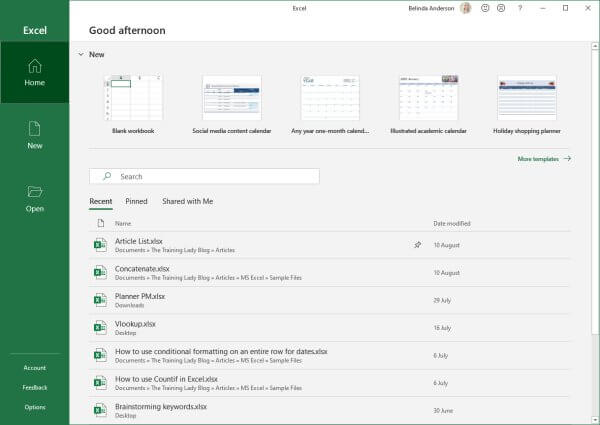
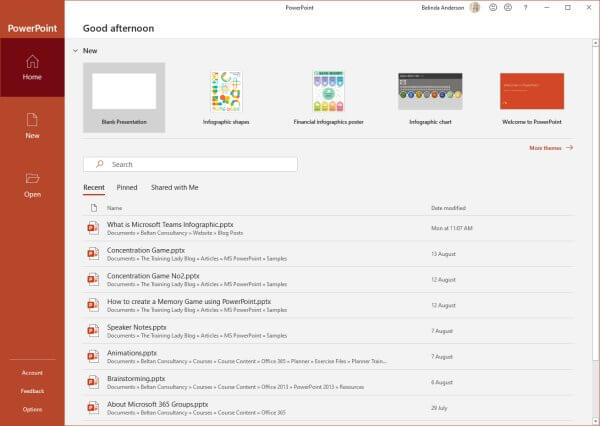
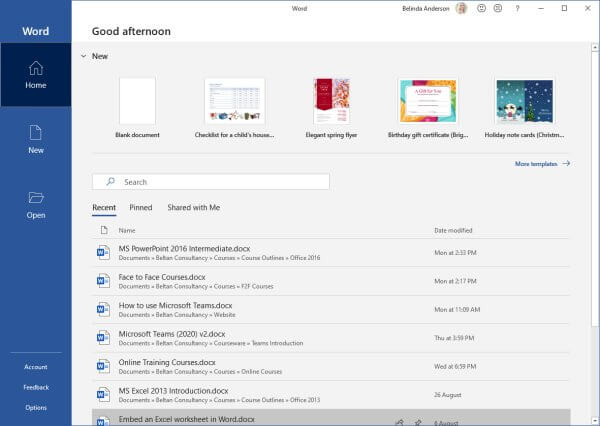
- Click the option for Blank worksheet, Blank presentation or Blank document option depending on which application you have opened
- Click the File tab and select Options
- Within the General section of the Options dialog box, look at the bottom of the window and locate the checkbox option for Show the start screen when this application starts
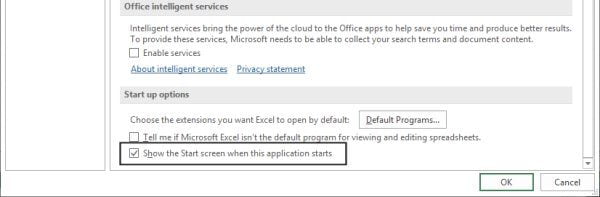
- Untick the box and click OK
- Close the application and restart it, you should go straight to the main screen with a new blank worksheet/presentation/document displayed
You have now turned off the Start screen setting. You always have the option of going back into the Options dialog box and re-enabling this setting. Comment below with any questions.