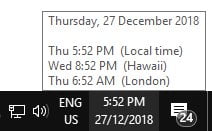
A great feature of Microsoft Windows 10 is the ability to display multiple clocks from different locations at the same time within the system clock area. The way in which you can add additional clocks to your Windows 10 clock display is very clean and unobtrusive. It allows you to display up to 3 different time zones, or clocks, in total (including your own time zone) which is very handy when dealing with colleagues, associates, clients or even family who are overseas. Have a relative going overseas? Add their new time zone to your clock display and you will easily to be able to identify when they will be online for that next Skype call!
To display multiple clocks, follow these steps:
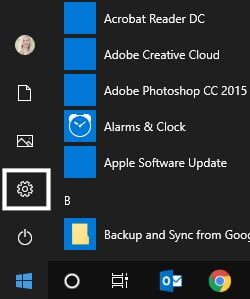
- Click Start > Settings
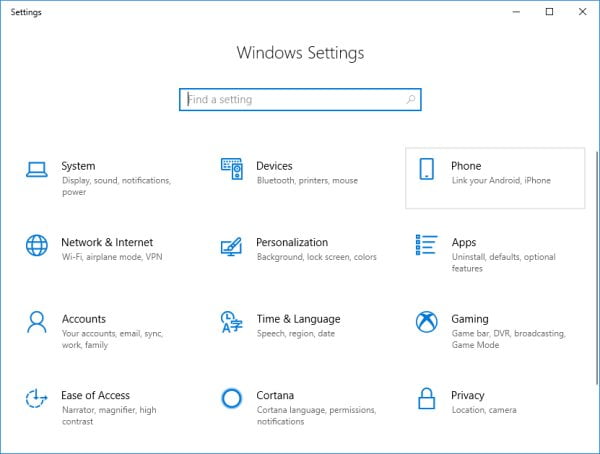
- The Windows Settings window will be displayed
- Click the Time & Language icon (icons are not displayed in alphabetical order)
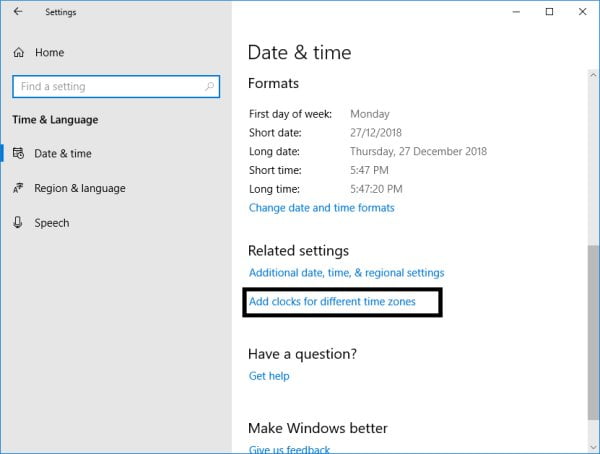
- Within the Date and Time window, you will see an option on the right-hand side, or at the bottom of the screen under Related Settings for Add clocks for different time zones, click this link:
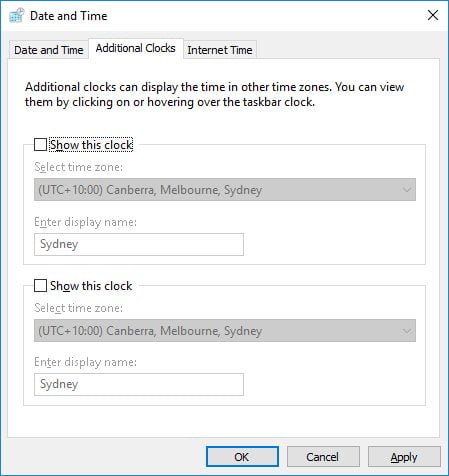
- From the Date and Time dialog box, tick the first box for Show this clock
- Now click the drop-down menu for the Select time zone field and search for the time zone of the additional clock you wish to include
- I’m going to locate the (UTC -10:00) Hawaii time zone
- Now place your cursor in the Enter display name field and type the name you wish to display for this clock
- To display a 3rd time zone, tick the second box for Show this clock and again select the time zone you wish to add and give it a display name
- Click OK
- Now move your cursor and hover over the system clock located in the bottom right corner of the screen
- You will see your local time and the new time zone(s) displayed
Have fun with this feature and remember to change your clocks as required to suit your needs at the present time. If you have any questions please do not hesitate to contact me.


