

One of the first things I do when I set up a new computer, or rebuild my computer, is customise! One of the ways that I achieve this is by sticking, or “pinning” the applications I use the most to the Start menu.
I like to keep a clean desktop area and have found that using the Start menu to customise the way I access applications means that my desktop stays clean. By pinning applications in this way you take away the need to search for programs within the Start menu. I also find it a little annoying when my Start menu changes constantly because of how often I access each program.
The Windows 10 and Windows 11 Start menu both provides you with the flexibility to create your own customised menu.
Customising the Start menu in Windows 10
Microsoft Windows 10 allows you to create your own groups of icons which you can display as “groups”. The Windows 10 Start menu is broken into three areas. On the far left, you will find smaller icons (1) which provide quick access to your Account, Documents, Pictures, Settings and the Power options. In the middle is the alphabetical list of programs or apps (2) installed on your computer. On the right, you will see any pinned programs or applications (3).

To pin an application to the Start menu in Windows 10:
- Click on the Start menu button which is located in the bottom left corner of the screen.
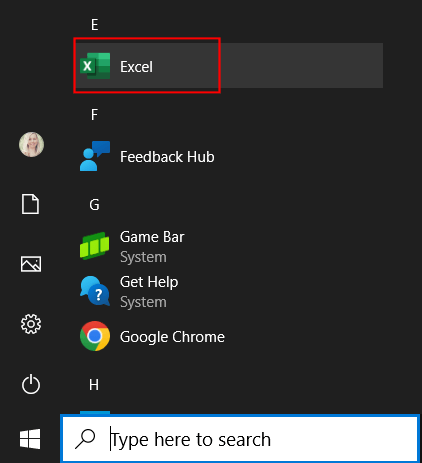
- Scroll through the alphabetical list till you find a program you wish to have quicker access to, e.g Excel:
- Right mouse click on the application and choose Pin to Start.
- Click back on the Start menu and you will now see the application displayed on the right side of the Start menu.
- Repeat the process to pin further applications to the Start menu.
Group applications on the Start Menu
Once you have pinned the applications to your Start menu, you may wish to move them around to put them into a more suited order.
- Click the Start menu and use the mouse to click and drag each application icon to the location of your choice.
- You can create multiple groups of icons which then allows you to give the group a name.
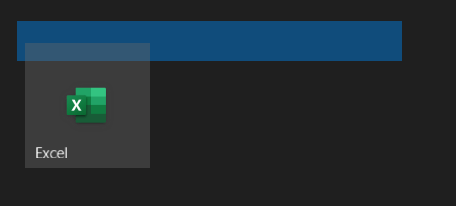
- To create a new group, move an icon below or to the side of an existing group til you see the blue shadow appear:
- Drop the icon into the new group.
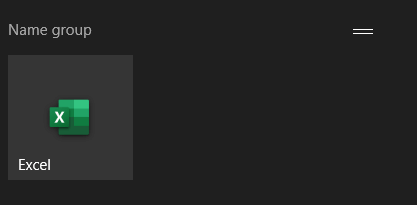
- To name the new group, hover just above the icon till you see the Name group prompt appear:
- Click once so the Name group prompt is highlighted.
- Type a relevant name for your new group e.g. Microsoft 365.
By customising your Start menu you can save yourself valuable time each day so it is worth the 5-10 minutes these customisations may take.
Customising the Start menu in Windows 11
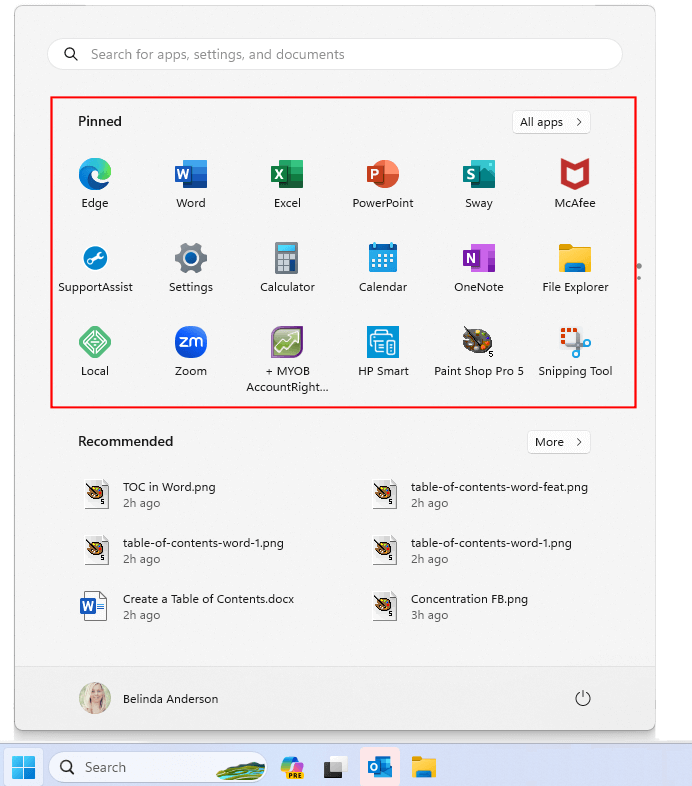
If you have a newer computer, or you upgraded to Microsoft Windows 11, you will have a slightly different interface for the Start menu. The Windows 11 Start menu does not allow you to group applications together and name them but you do have the ability to customise the Start menu with the applications you use most frequently by using the Pinned area of the Start menu.
To pin an application to the Start menu in Windows 11:
- Click on the Start menu button which is located in the centre at the bottom of the screen.
- Click the All Apps button in the top right corner.
- Scroll through the alphabetical list till you find the program you wish to have quick access to, e.g Excel:

- Right mouse click on the application and choose Pin to Start.
- Click back on the Start menu and you will now see the application displayed under the Pinned heading.
- Repeat the process to pin further applications to the Start menu.
If you have any requests on how to make your tasks more efficient, please contact me. If you liked this customisation, you will also like my post on how to Create a custom toolbar menu in Windows 10.


