

If you are creating forms using Microsoft Forms then let me show you how to incorporate sections into those forms. Sections allow you to divide your form into, as the name implies, sections! This allows your users to fill out answers which may be grouped together. The other big advantage is that sections break your form into separate screens. For example, section 1 is displayed on the first screen. The user then clicks “Next” to go to the second section and complete the next set of questions.
Create a new Form
- Open your web browser and go to forms.microsoft.com and login.
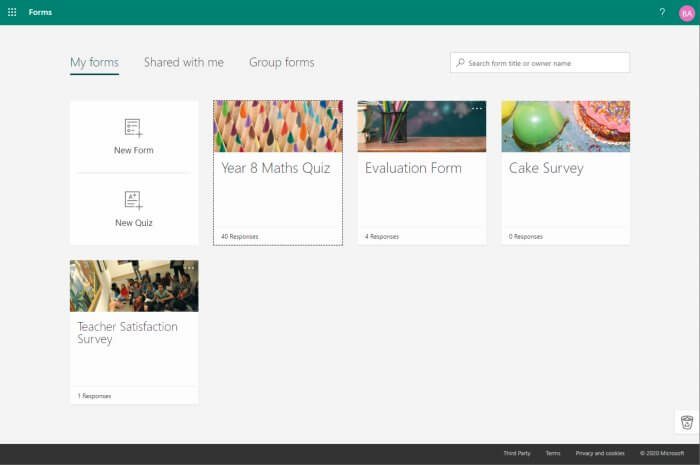
- From the My Forms screen click New Form:
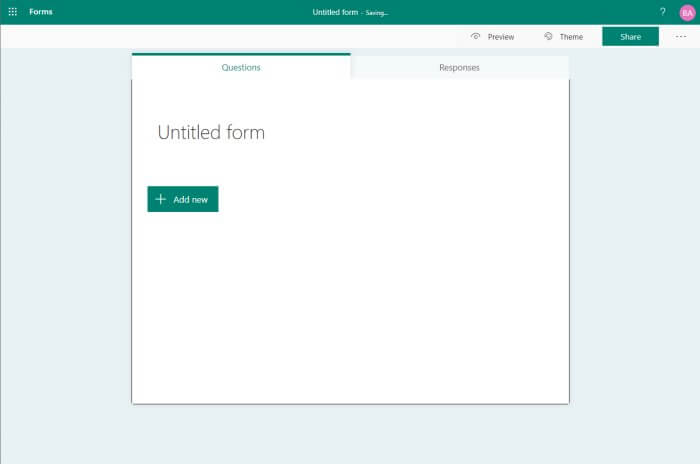
- A new untitled form will appear:
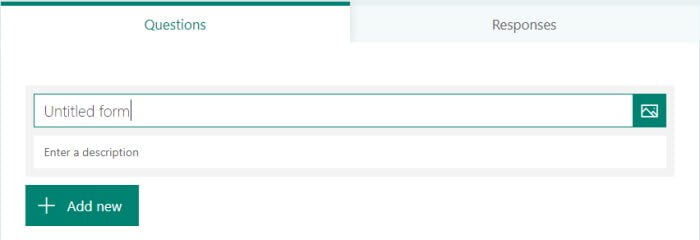
- Add a title, or heading, to the form by clicking in the Untitled form field:
Add a section
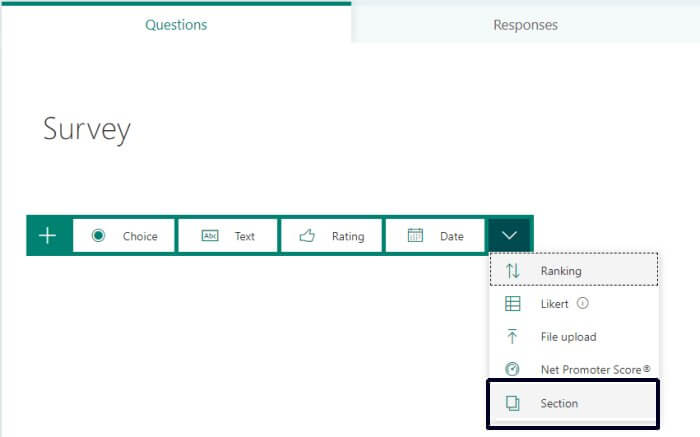
- Click the Add new button and select the drop-down arrow on the right, then choose Section:
- You will see that Section 1 has been added to your form:
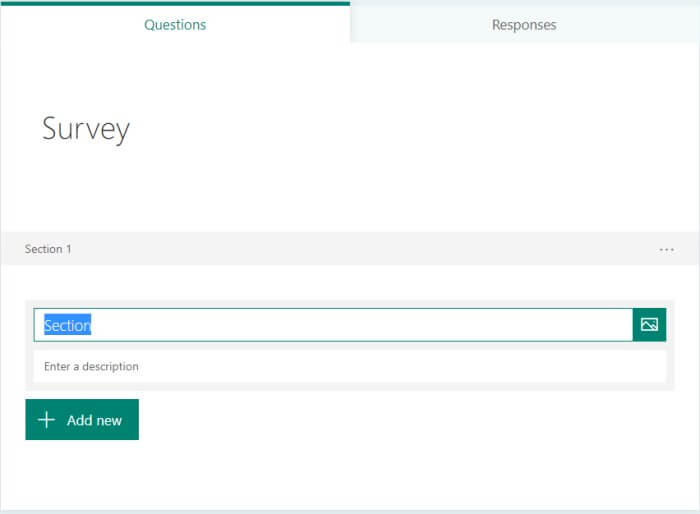
- Add a section name, or heading into the field provided.
- You can also enter a description which might include instructions for the viewer.
- Now we will add some fields in to collect data.
- Click the Add new button and select Text.
- This is where I want to collect a name or email address.
- The Text field type allows you to choose if you wish to allow a Long answer, or set the field as Required. Use the switches to enable these options. If you click the ellipsis (…) you will also find options to add a subtitle, apply restrictions on the type of answer you want to accept, or add branching.
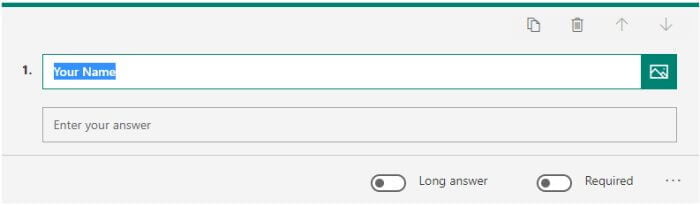
- Continue adding fields you require in section 1 of the form
Preview the Form
When I am creating forms I tend to preview them quite frequently. It gives me a good idea as I’m going along if I have things looking and functioning how I want them to.
- Click the Preview button.
- You will now see the form in the same way your users will.
- You have the option of previewing the form as it will appear on a Computer or Mobile. Use the buttons in the top right to switch between the two views:
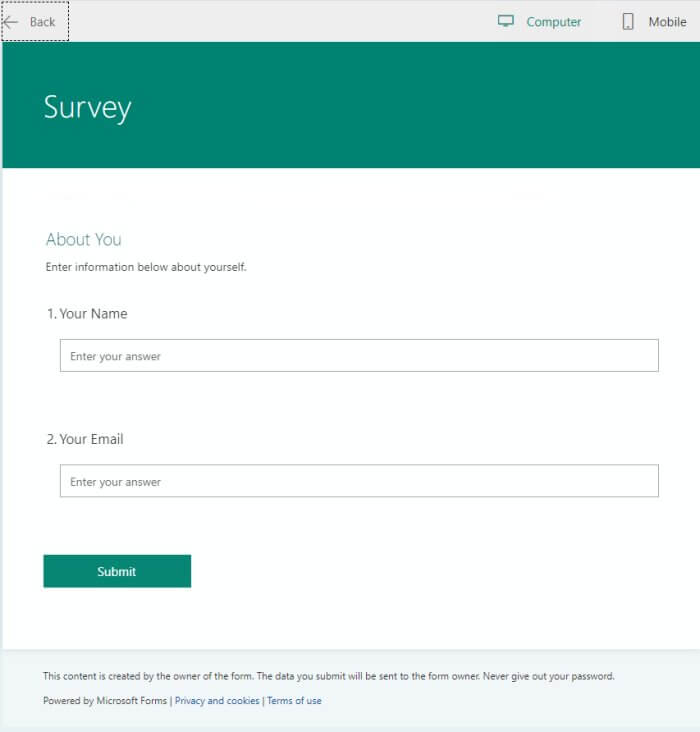
- Click the Back button to return and continue building your form.
Create section 2
- Click the Add new button and select the drop-down arrow on the right, then choose Section.
- Now repeat the process to create the second section of your form including fields.
- Don’t forget to preview your form.
- You will now see that at the end of each section, the form displays a Next button:
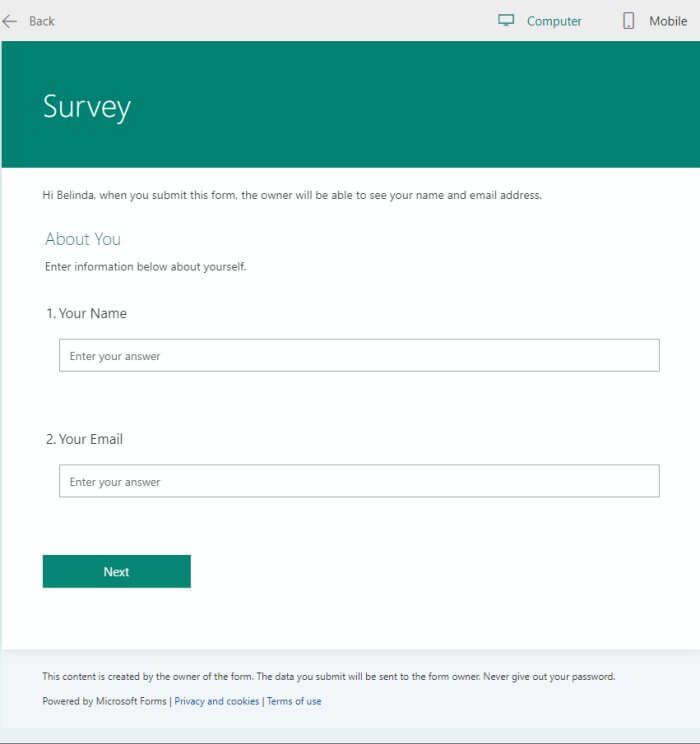
- Click the Next button to move to the next section
- Repeat these processes until you have created all sections as needed
Share the Form
Once you have completed the form and are happy with the functionality, you can share the form to begin receiving responses.
- Click Share from the top right corner.
- Choose if you wish to share the form only with people within your organisation, or anyone with the link:
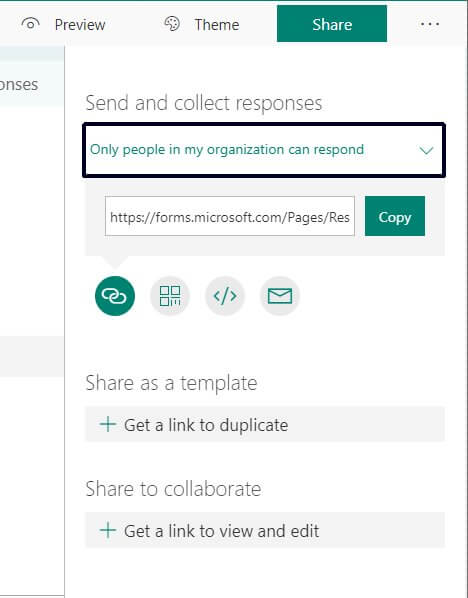
- Copy the link and send to those you need to complete your form
View my demo form
If you’d like to see my simple demo form, click the link below:





4 Responses
I have a form with multiple sections. The same two text questions are asked in each section. In the responses, I can see the section headings, so it looks like the same two questions/answers are repeated over and over. Is there a way to see the responses by sections? Otherwise I’ll just do away with the sections and incorporate the section heading content in the questions. It will just be awkward. Thanks.
This is great thanks! How do you analyse results -do you have any vids for analysing survey results or quiz results please?
Hi Mary,
I would export the responses to MS Excel and use the analysis tools within Excel. I also then have the ability to incorporate formulas to work out various statistics relating to the responses. I plan to add more content relating to Microsoft Forms and will add your question in as an article topic. Glad you have found this information useful.
Regards,
Belinda
Thanks Belinda!