A common issue when working with long documents is how to maintain consistent formatting across all pages? Learning how to use Styles in Word is a fundamental skill that all users should have yet many users don’t understand. Working with a document is not just about adding text, it is also about making that text easy to read and ensuring the document flows well.
Personally I am a huge fan of styles and I use them on a very regular basis. In fact, I’m using them right now as I type up this draft post on my computer. Styles in Word provide an easy and efficient way to apply consistent formatting to any document and make it simple to change styling across an entire document at any stage in the future.
One added bonus of using Styles in Word is the fact you can then automatically create a Table of Contents. Be sure to check out how to create a Table of Contents using styles once you are finished here.
What is a Style in Word?
Styles are essentially a group of formatting properties that you use under a single defined name. Instead of applying a font style, size, paragraph spacing or any other formatting options to each individual sentence or paragraph, you can save these formatting settings as a Style which is defined by a single name.
There are three main types of styles in Word:
| Paragraph and Character | Paragraph and characters styles are used to format the majority of the text found within a document as it includes individual characters which you may wish to format and also entire paragraphs. Some styles can be used for both characters or paragraphs and these are called Linked styles. |
| Table | Table styles are used to determine how a table will be formatted. This can include everything from table or cell alignment, borders and shading, and even the font used within the table. |
| List | List styles allow you to format numbered list and bullet lists. You can create specific alignments for numbers or symbols and also the positioning of the text within the lists. |
The Style Gallery
The Style gallery provides an easy way to access the built-in styles in Word. The gallery is displayed on the Home tab of the Ribbon and provides a visual representation of what the style looks like along with the name of the style.

Some useful tips
Some useful tips when navigating and viewing styles include:
- The Styles listed in the gallery are the most commonly used styles so you will find that the options displayed will change depending on the document and what you have used previously.
- Generally, body text within your document is formatted as the Normal style.
- Headings should be formatted as one of the built-in Heading styles and you have from Heading 1 to Heading 9 already defined and ready to use.
- In the bottom right corner of the Styles group, you will see a button called the Styles Dialog box launcher. This button will launch the Styles task pane which gives you a vertical list of the styles available.

- The Styles task pane allows you to access some additional functions when working with Styles so I highly recommend you explore this panel.
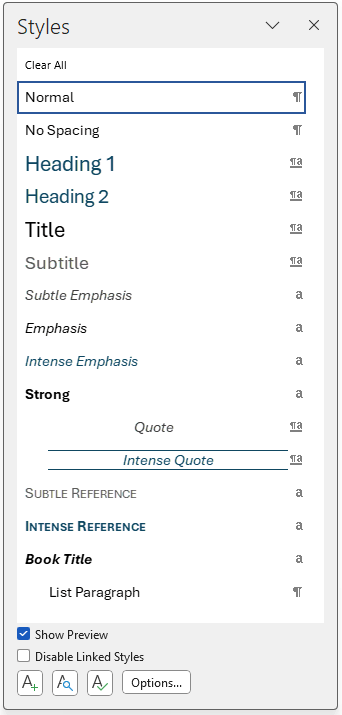
- When using the Styles task pane I recommend you enable the Show Preview option as this gives you a visual preview of each heading style rather than just seeing the name. The Show Preview checkbox is found at the bottom of the Styles task pane.
How to apply a style to text
To apply a style to text, follow these steps:
- Open Microsoft Word
- Open a document you wish to use with styles, or create a sample file by typing in some headings such as below:
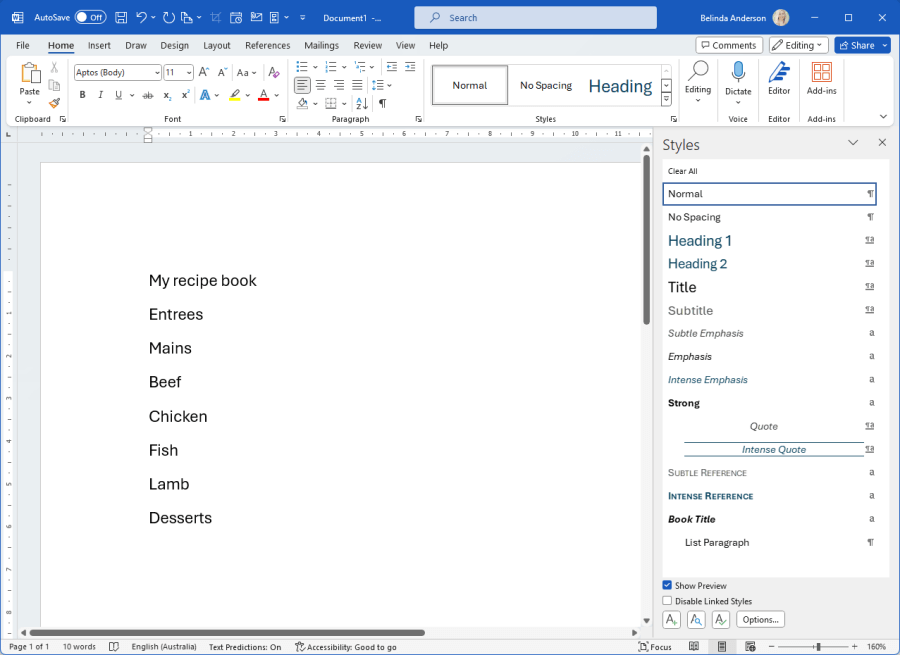
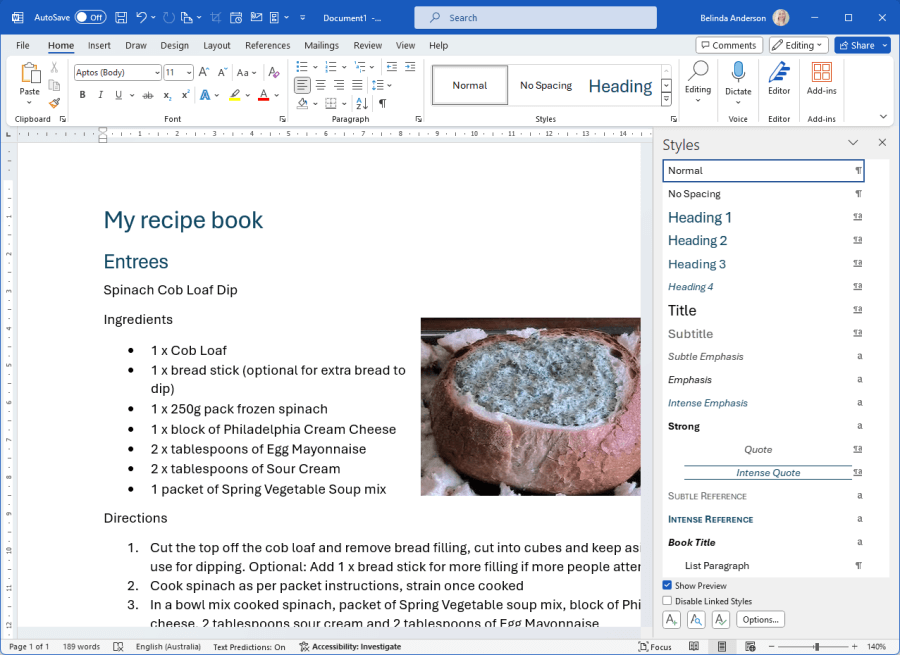
- With this example, I am creating my own recipe book which will be full of all the foods I love to cook. I am going to have multiple headings setup for the type of meal it is (Entree, Mains, Desserts) and also subheadings under each type of meal to identify what type of food the recipe relates to.
- To apply a style, highlight the text you want to format, then click on the style from the Styles gallery on the Home tab
- Highlight the first line of text which in my example is the text My recipe book
- Select Heading 1 from the styles gallery
- The text will now be formatted the same as the Heading 1 example
- Now select the next line of text. You will need to ask yourself this question, is this heading the same type of heading as what you have selected as Heading 1 or is this more of a sub-heading of the first?
- In this example, our main heading for our entire document is going to be: My recipe book. Our subheadings will be Entrée, Mains and Dessert. I will then have subheadings of those for the different types of main dishes I will be including.
- Highlight the second heading type and apply the Heading 2 style by clicking on the style
- Repeat this process and highlight headings Mains and Dessert and apply Heading 2 style to these:
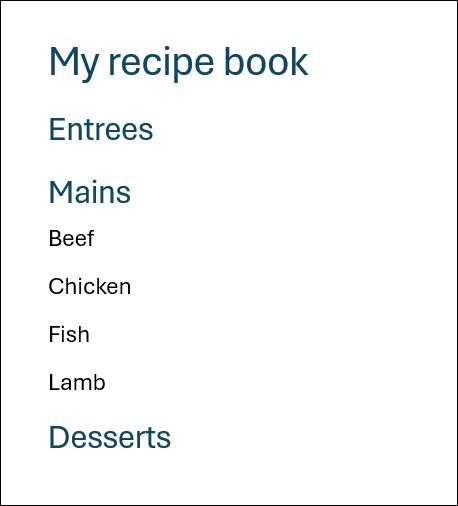
- Now repeat the process and highlight Beef, Chicken, Fish, Lamb and apply Heading 3 style to these.
- Now that we have applied some heading styles we can then continue creating the document by putting recipes into the various sections we have set up:
- Later if we decide that we want to change the font or colour used in any of our headings we only need to change the formatting within the style, and any text we have formatted with the style will automatically update.
Edit a built-in Style
Now that I have some content in my document, I’d like to customise the way my headings all look. I can do this by editing the Style formatting which will then be applied to any text where I have used that particular style.
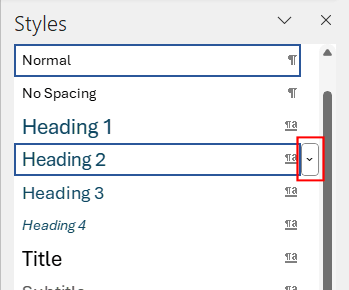
- From the Styles panel hover your mouse over the Heading 2 style, locate and click the drop-down arrow on the right:
- Choose Modify from the options.
- The Modify Style dialog box will appear:
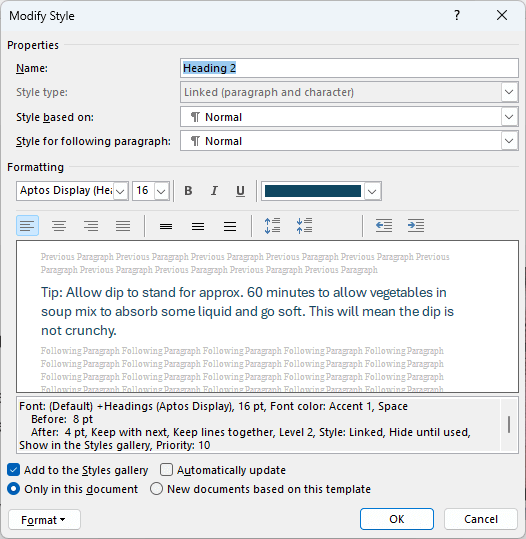
- Make any changes you wish to the formatting for Font, Font Size, and Colour.
- Click OK to save the changes.
- Each of the headings using the Heading 2 style will now be updated with the adjusted formatting you chose:

- Repeat these steps to edit any other heading styles you wish to change.
I hope you have enjoyed learning some of the basics of how to use Styles Microsoft Word. Don’t forget to take a look at the post on how to how to create a Table of Contents using styles.