

This week I am presenting a few sessions at the Leading a Digital School Conference being held in Melbourne, Australia. To provide participants with some additional resources I am publishing a series of posts which contain information from my sessions along with some tips and tricks.
My first session is 3D Model Animations in PowerPoint 365. I have really struggled to fit this session into the 30 minutes it has been allocated in the Office365 Training Lab. There is so much fun stuff we can create with 3D models in PowerPoint but I’ve narrowed it down to a few key areas.
Where to find 3D models
This is a big question… If you are like me, a complete amateur when you are trying to draw anything, then you are going to want ready-made 3D models to use. Fortunately, there are numerous websites around which allow those with the artistic gift to upload their 3D model creations and allow the rest of us to simply be in awe and download the models to use.
 This is a big question… If you are like me, a complete amateur when you are trying to draw anything, then you are going to want ready-made 3D models to use. Fortunately, there are numerous websites around which allow those with the artistic gift to upload their 3D model creations and allow the rest of us to simply be in awe and download the models to use.
Microsoft used to provide access to a website called Remix 3D however, unfortunately, it was retired in January 2020. You can still however insert 3D models directly through PowerPoint so do not fear.
There are many other websites out there if you perform a quick search. Alternatively, you can utilise the Paint 3D app which is part of Windows and create your own 3D models.
Insert a 3D model from Stock 3D Models
The old Remix 3D website has been replaced by a stock 3D model library. Let’s insert a 3D model from the stock library.
- Open Microsoft PowerPoint 365 and create a new blank presentation
- Insert a new blank slide (Ctrl + M) or change the first slide to the Blank slide layout (if you aren’t sure about slide layout, click here)
- Click the Insert tab and choose 3D Models
- From the drop-down menu select Stock 3D Models
- The Online 3D Models window will appear:
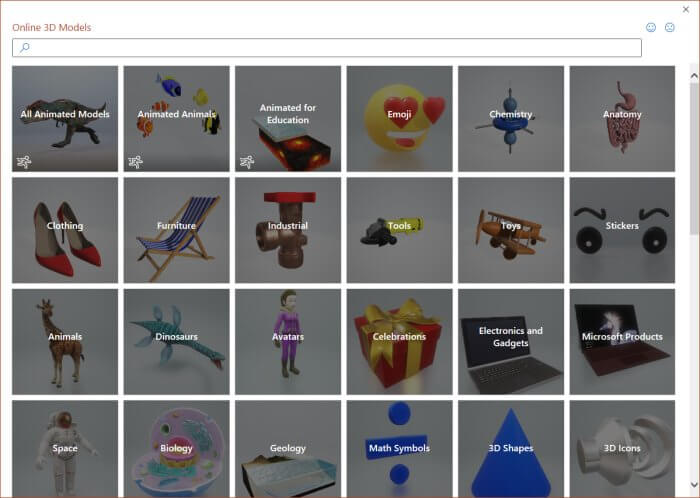
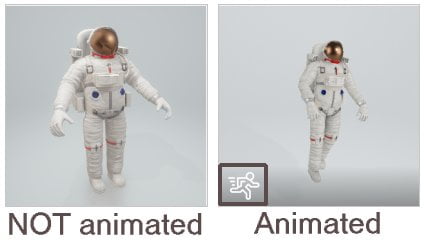
- You can either search by keyword in the search box provided or browse through the different categories on offer. Let’s first look at a 3D model without built-in animation. The running man icon will identify those models which are already animated for you.
- Click the 3D model you wish to insert and click the Insert button
- Give it a few moments while it downloads
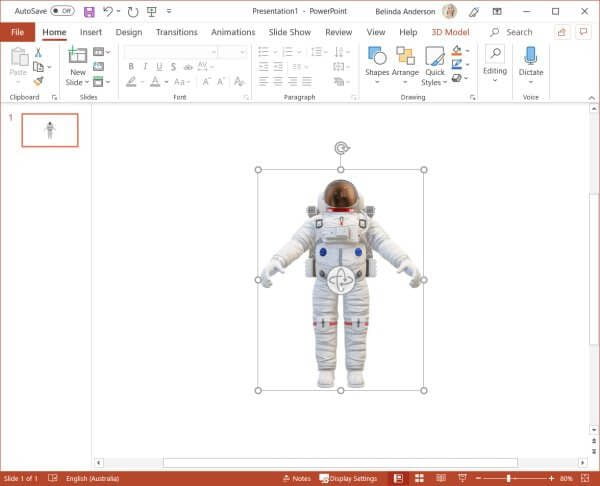
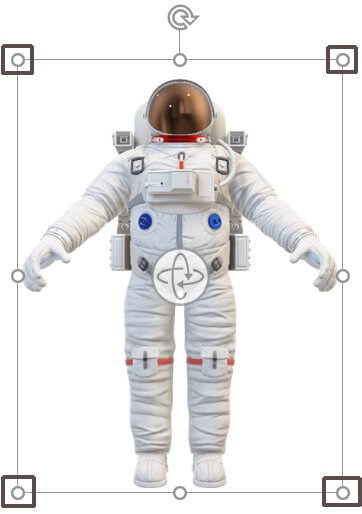
- The 3D model will now be displayed in the slide
Resize a 3D Model
To resize the model to suit your slide, use the corner resize handles displayed around the 3D Model.
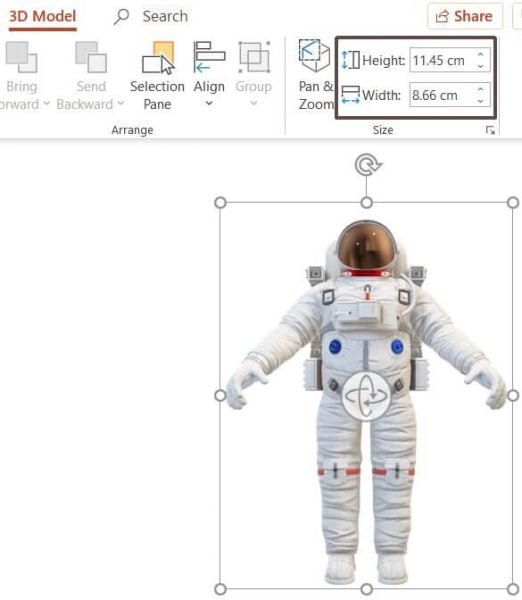
Alternatively, you can use the Size group within the 3D Model contextual tab.
Rotate the 3D Model
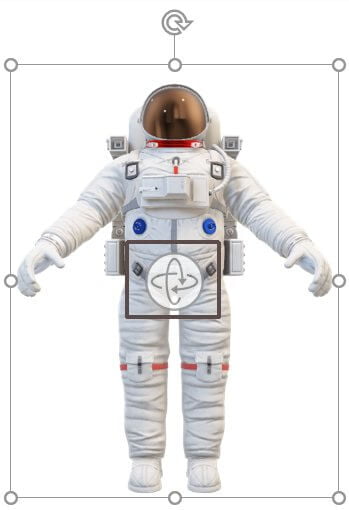
To rotate the 3D model to show the aspect you wish to illustrate, use the 3D control button displayed at the center of the 3D model.
Animate a 3D Model
PowerPoint will allow you to apply animation effects to your 3D models. On top of the built-in effects, you will also see some new 3D animation effects which work specifically with 3D models.
These new 3D effects include: arrive, turntable, swing, jump & turn, and leave.
To apply an animation effect:
- Make sure the 3D model is selected
- Click the Animations tab from the Ribbon
- From the Animation gallery click the More button to view all animation effects

- You should see the 3D group of effects
- Select an effect from those displayed, I’m going to use the Turntable effect
- A preview of the animation should begin
- Use the Timing group on the Ribbon to see the Duration setting. This is set to 20.00 (20 seconds).
- This takes a bit too long for my astronaut to turn around, I want to speed it up.
- Change the Duration setting to 08.00 (8 seconds)
- Click the Preview button on the left side of the Animations tab to preview the change
- That’s a bit better. You can adjust this setting till you have your preferred speed
Let’s add another animation, this time we want the astronaut to jump and spin. To make it a bit easier to work with, let’s display the Animation Pane.
- From the Animations tab click the Animation Pane button

- Now that the animation pane is displayed on the right of the screen, let’s add a second animation to the astronaut
- Select the 3D model and now click the Add Animation button (to the left of the Animation Pane button you just clicked)
- From the animation list, select the 3D > Jump and Turn effect
- A second animation has now been added to the astronaut and you will see it listed in the Animation Pane
- Again you can slow down or speed up the “jump and turn” by adjusting the Duration setting
If you preview these animation effects in slide show mode (use F5 on the keyboard), nothing happens unless you click the mouse or press a key on the keyboard. Ideally, I’d like these animations to just happen without me having to prompt it.
Set the Animation to automatically start
To make our animations automatically happen one after another, we need to change the Start setting within the Timing group. By default, these are set to On Click which means I need to click the mouse or press a key on the keyboard. I want both animations to happen automatically.
- Select the first animation in the Animation Pane
- From the Animations tab change the Start setting to After Previous
- Repeat this step for the second animation
Even though there is technically nothing happening before the first animation, PowerPoint considers the slide being displayed on the screen as an “action” and therefore it triggers the first animation to begin.
Press F5 to see the animations in Slide Show mode again and check that it works without your intervention.
Insert an animated 3D model
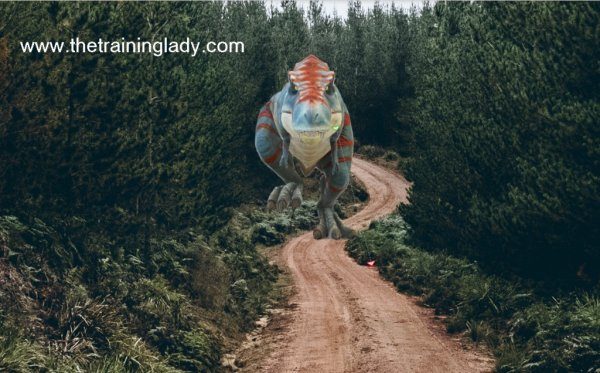
The Remix 3D gallery provides some 3D models which have already been animated for you. The level of detail in these animations are amazing. These are always fun to have a play with. On my sample, I have added a background image to set the scene for my 3D model. For free stock images check out Pexels.com.
- Let’s insert a new blank slide, press Ctrl + M on the keyboard
- Firstly I need to add my background image, click Design > Format Background
- The Format Background pane will appear
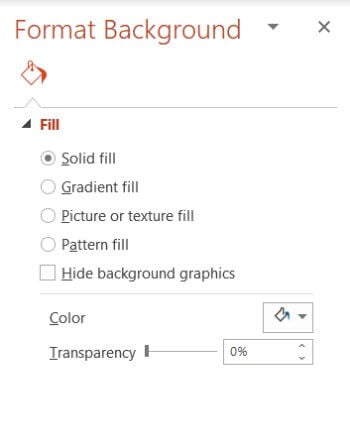
- From the Fill options select Picture or texture fill
- Click the File button to insert your picture from file
- Select the background image you wish to use and click Open
- The background image will now be displayed on your slide

- Now to add our animated 3D model, click the Insert tab and choose 3D Models
- From the drop-down menu select From Online Sources
- The Online 3D Models window will appear
- From the categories, we are going to select All Animated Models
- Have a browse through the animated model options to see the choices, I’m going to use the T-Rex
- Select the model and then click the Insert button in the bottom right corner
- The 3D model will now appear on your slide
- You can resize and rotate it just the same as you can for a static 3D model
- If you click to select the model, the animation will begin. There is a Play/Pause button which appears on the 3D model to allow you to control if the animation is active or not.

We are now going to apply some additional animation effects to give the T-Rex the appearance that he is running towards us.
3D Model Scenes
An amazing extra bonus you get with animated 3D models is the inclusion of Scenes. The Scenes provide you with various different animation options. As an example the T-Rex has 5 different scene options which allow me to choose between the T-Rex running (scene 1), the T-Rex crouching down and looking around (scene 2), the T-Rex stopping and then making a roar gesture (scene 3), the T-Rex flips his tail around then roars (scene 4), or the T-Rex just standing and looking around (scene 5).
To change the scene option:
- Select the animated 3D Model
- Click the 3D Model tab from the ribbon
- Click the Scenes button (second from the left) and choose a different scene option
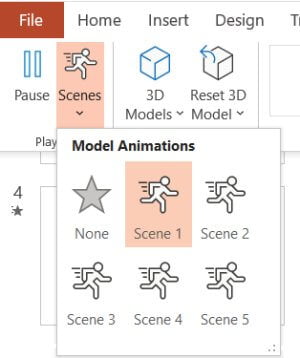
- Go back to the Scenes button to explore the option scene options
Animate your 3D Model
Now we will apply some animations to our already animated 3D model to give the effect that he is running towards us.
- I am going to position the T-Rex at the end of the far end of the dirt road and change his size to suit. We want him to grow in size as he runs towards us down the road.
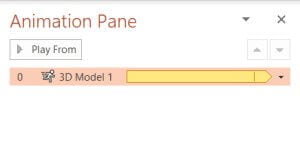
- Make sure you can see the Animation Pane still to make this process a bit easier
- You should see there is already one animation for the 3D model scene, this needs to be there so that the running animation is included in the sequence. If you accidentally remove it, select the model and click the 3D Models tab then click Scenes and choose Scene 1 again, it will be added back into the Animation Pane sequence.
- Click the Animations tab from the Ribbon
- Click the Add Animation button
- Scroll through the options and locate the Motion Paths. I’m going to use the Custom Path so I can guide my T-Rex through the slight bend in the road. This part might take a little practice. If you prefer you can just use the Line motion path and have the T-Rex run in a straight line.
- Once you have selected the Motion Path, use your mouse to draw the path from your T-Rex to the road closest to the front, to finish the Custom Path you will need to double click the mouse.
- You will now see a preview of your custom path. Don’t worry about the speed just yet.
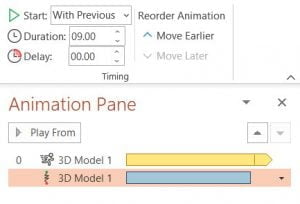
- You will now need to change the Start setting for the animation, set this to With Previous
- Now we need to slow the Motion Path animation down so the T-Rex doesn’t move so quickly
- Select the Custom Path animation from the Animation Pane
- Change the Duration to approx 09.00
- Preview the animation using Alt + F5
Make our T-Rex grow
I want my T-Rex to look as though he grows in size as he runs towards us. Let’s use the Grow/Shrink animation effect to achieve this.
- Select the 3D Model and from the Animations tab click the Add Animation button
- Select the Grow/Shrink effect
- You will now see you have 3 x animations displayed in the Animation Pane
- Change the Start setting to With Previous so that all animations happen together
- Let’s set this to the same Duration as the previous animation which was 09.00
- Preview the animation using Alt + F5
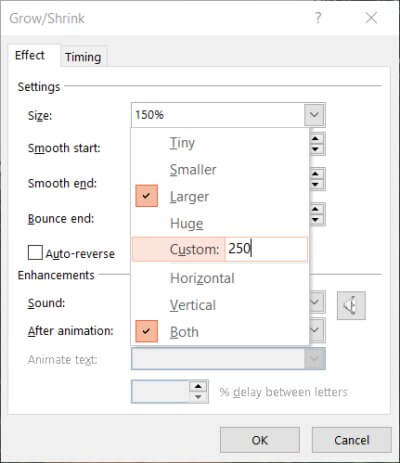
- Now the T-Rex hasn’t really grown as much as I’d like him to, to change this click on the drop-down arrow displayed on the right side of the Grow/Shrink effect and select Effect Options
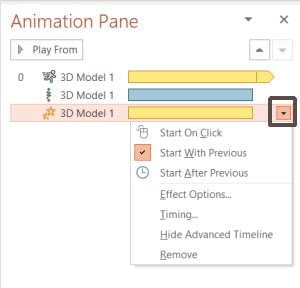
- I am going to change the Size to be 250% and press Enter and then click OK
- Preview the animation again using Alt + F5
- Your 3D Model animation is complete
Why not experiment with some of the other animation effects to see what you can come up with.
I hope you have enjoyed this session. Feel free to comment below with any questions.


3 Responses
May I know if the All Animated Models is still available if I subscribed to Microsoft 365 today?
Thank You
hi my friend i hope you can help me in my office 365 in 3d models i haven’t the Online Sources can you help me with t
Hi Hanan,
You may need to check the version of PowerPoint 365 you have as Microsoft release updates regularly. Open PowerPoint and go to File > Account. Click the Update Options button and select Update Now.
I hope this helps.
Belinda