If you’ve just discovered Microsoft OneNote then you may be wondering how you can utilise this wonderful program. First and foremost OneNote is a note-taking program which allows you to keep your notes organised into a simple filing structure know as notebooks.
One of the important parts of using OneNote is to make sure you organise your notes. Separate notebooks is a must to make sure there is a logical structure to where you will put notes based on their topic or relationship to other information. This also means that it will be easy to locate information in the future when you need to refer back.
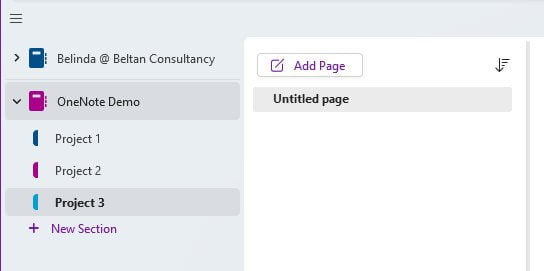
Each OneNote notebook is made up of sections and pages.
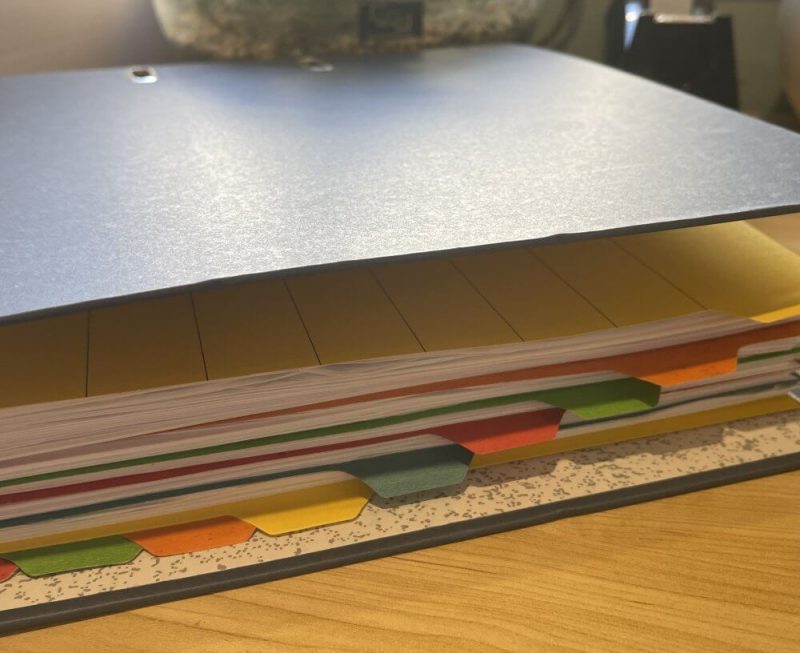
I always say that a OneNote notebook is exactly like a good ‘ole lever arch folder. You have the section dividers and then pages within each section.
How many sections you have is completely up to you. How many pages you have in each section is completely up to you.
Hopefully by now you have already downloaded OneNote and installed it on your computer. It is available for PC, Mac and mobile devices.
If you have not yet created a Notebook, check out my post to get you started.
The OneNote interface
The OneNote interface is very much like other Microsoft apps. It is made up of a Ribbon which displays various tabs that allow you to move through all the command options.
You then have a sidebar, pages list and the actual page content area.
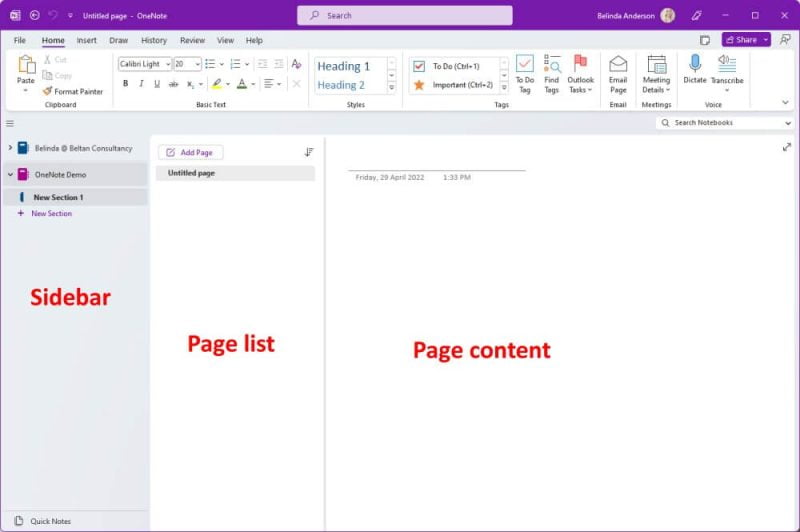
The Sidebar allows you to switch between any open notebooks. You can see in the example above, I have two (2) open notebooks that I can move between. The sidebar also shows the different sections within each notebook.
You then have the Page list, which allows you to view any pages within a given section. Lastly there is the page content area which is where you add your notes and information.
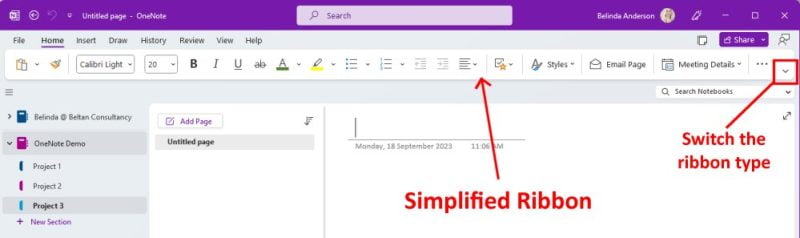
One thing which you may notice about the Ribbon area when you start up OneNote, is that it is condensed down into one row of commands. This is called the Simplified Ribbon and it is the default option. If you prefer the more detailed version of the Ribbon, like what is in the example above, you can switch back to the Classic Ribbon using the small down arrow on the far right side of the Ribbon area. Click the arrow and choose Classic Ribbon.
Sections and Pages
As mentioned, a OneNote notebook is divided up into sections and then pages. A new notebook will automatically have 1 section and 1 blank page ready to go. Anything over and above that you’ll need to add yourself.
To create a new section:
- Make sure you have a notebook open.
- From the sidebar click the option for + New Section
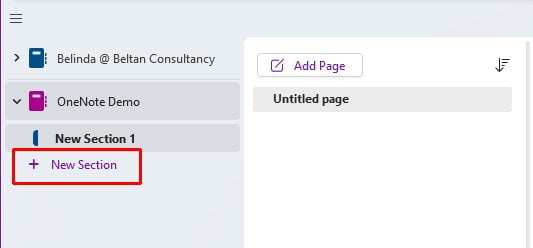
- A new section tab will appear within the notebook.
- To rename the section, right mouse click the section tab and choose Rename from the menu.
- Be sure to also rename the first section that was created for you.
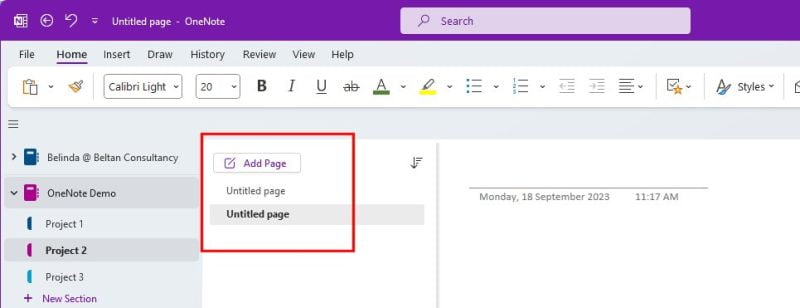
Each section can now have as many pages as you need to fit the content in. How much content you add per page is really up to you. To add a new page:
- Click inside the section you want to add the new page.
- At the top of the Pages list, click the Add Page button.
- The new page will appear as Untitled page.
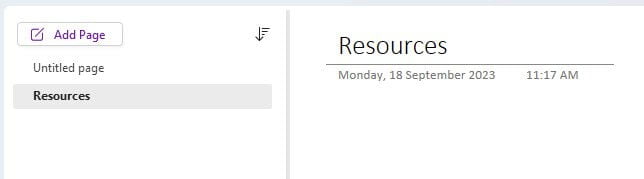
- The page name is determined by the page title you add at the top of the page.
- Click into the page title area and type in a page name.
- You will see the page name automatically updates in the page list.
Add text to OneNote
Now that you have sections and pages ready, let’s look at how to add some of the text-based content types into a page. We’ll look at some basic text, creating bullet or numbered lists and also using the Styles in OneNote.
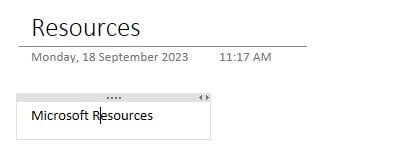
One of the first things that feels unusual to some users is the fact that the cursor does not automatically position itself in the top left corner of each page. We are used to this happening in Microsoft Word, but in OneNote the pages do not have the designated start point. You can click anywhere on the page area and the cursor will allow you to enter content.
- Click anywhere on the page.
- The cursor will appear allowing you to type.
- Type in some text that you will use as a heading.
- Once you have added some text, OneNote will create a note container. A note container works similarly to a text box in that it holds the content but it does not automatically show a border around the outside. We’ll look at note containers in a moment.
- The container will grow with your content or you can manually adjust the width using the left and right arrows displayed in the top right corner of the container.
- Use the Enter key to add in additional paragraphs of text if needed.
- Just as you can format text such as font, font size and colour in other programs, OneNote also allows you to use these basic formatting options.
- Access the font formatting options via the Home tab of the Ribbon.
Use Styles in OneNote
If you are an avid user of Microsoft Word, then you’ll likely be a fan of using Styles. OneNote provides access to these same Style options although it is not yet as flexible in terms of being able to modify the built-in styles.
To apply a style in OneNote:
- Highlight or place your cursor within the paragraph or sentence you wish to style.
- From the Home tab on the Ribbon choose a style to apply from the options.
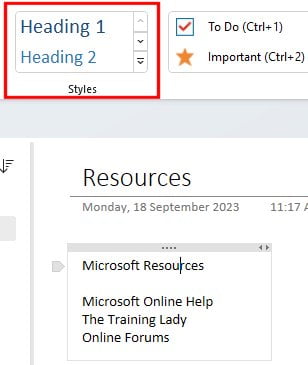
- The text will now be formatted using the Style.
- Repeat the process to format any additional content.
Create a bullet or numbered list
Now let’s look at using bullet or numbered lists within a page. This works exactly the same as using these features within Microsoft Word or PowerPoint.
- If you already have content you’d like to convert into a bulleted or numbered list, highlight the existing content.
- If you want to create a new bullet or numbered list, place your cursor where you want the list to start.
- From the Home tab on the Ribbon, click the Bullets or Numbering button.
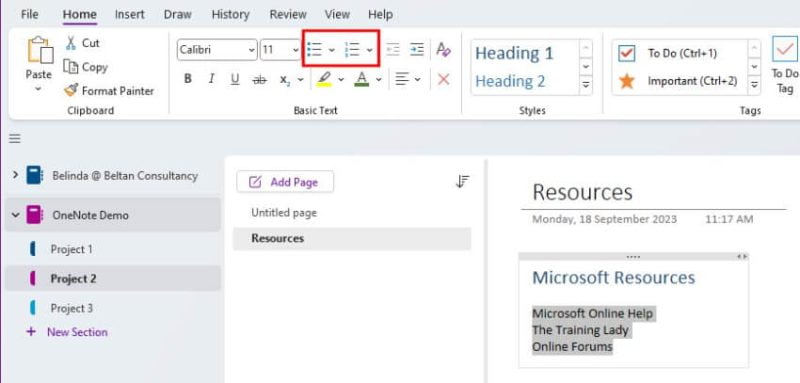
- The bullets or numbering will now be applied.
- To change the bullet point or the style of numbering being used, click the drop-down arrow next to either of the main buttons to change the styling.
Move content around in OneNote
Getting used to the idea of note containers in OneNote can be a little tricky. But once you have the hang of it then they are very simple to use.
Whenever you add content to a page in OneNote, a note container is created. This includes text, pictures, audio, video, screen clippings and also ink annotations.
This container holds the content and will grow with your content as needed. You can also manually resize the containers, and easily move them around your page. This is very useful once your page has lots of content. You can easily drag and drop each note container into a better position to make the layout of the page more organised.
A note container has two handles which allow you to move and size the container.
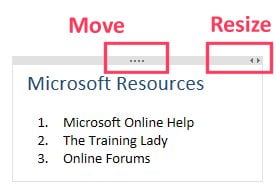
- Practice by clicking inside a note container.
- Place your cursor over the Move handles and drag and drop the container to a different position on the page.
- This time place your cursor over the Resize handles and drag either left or right to either increase or decrease the width of the container.
Adding content to your OneNote notebook is a straightforward process that allows you to capture thoughts, ideas, and information efficiently. By organising your content into notebooks, sections, and pages, you can maintain a well-structured digital workspace. Be sure to check out some of the other OneNote posts here to begin exploring more of what OneNote has to offer. Happy note-taking!
Be sure to comment below with any questions or subscribe to our RSS feed to be updated when new content is added.