

Did you know you can create a quick poll using Microsoft Forms all from the comfort of Outlook? Yep that’s right, you don’t need to specifically create the form in the Forms website.
This feature is especially useful if you want to gauge the opinion of a group of respondants for a single question. You can create the poll quickly within your email message and all respondants will be able to answer via a link in the email message. You can then view all responses via the Forms website at any time.
There are a few key things to note about this feature. Firstly you can only include one multiple choice question. Once the poll has been created and sent, it is not editable later on. You can view the results of the poll via the Forms website.
So let’s get started and see how you can create these super quick and easy polls in your outgoing emails.
- Open Outlook 365 or Outlook Online.
- Create a new blank email message (Ctrl + N on the keyboard).
- Click the Insert tab.
- From the options choose Poll:

- The Poll panel will open on the right:
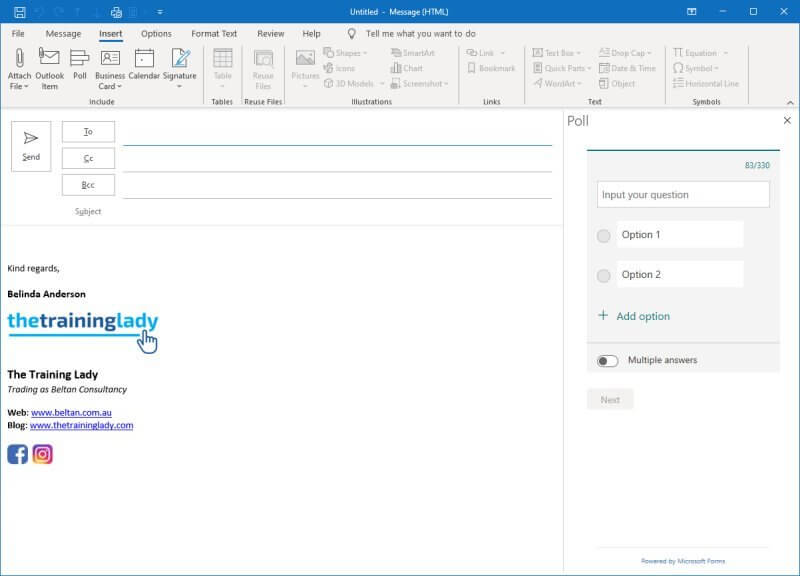
- You can now begin to create the question in your poll.
- Type in the question.
- Add any answer options you want to include in the Option fields.
- If you need additional answer options, click the Add option button:
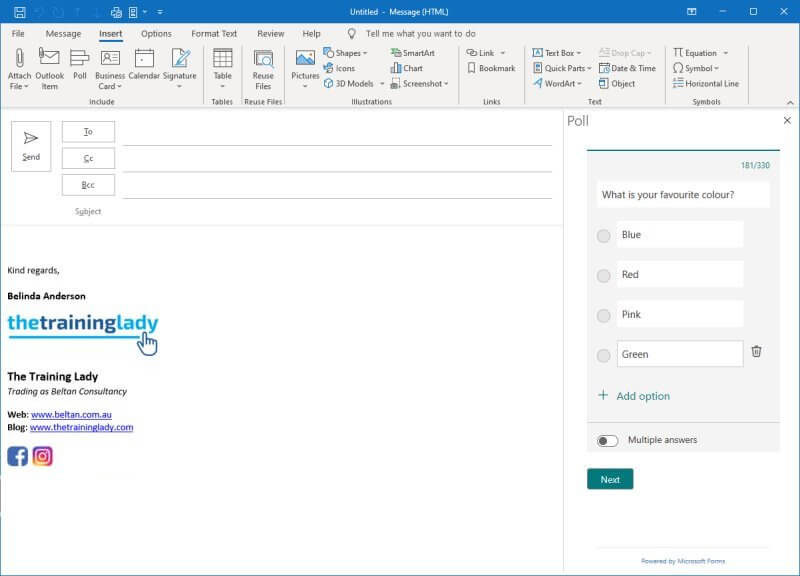
- Click Next.
- You will now see what the poll will look like for the recipient:
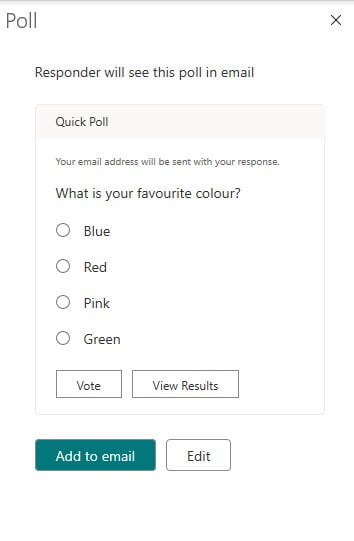
- Click Edit if you need to make any changes.
- If you are happy with the poll, click Add to email:
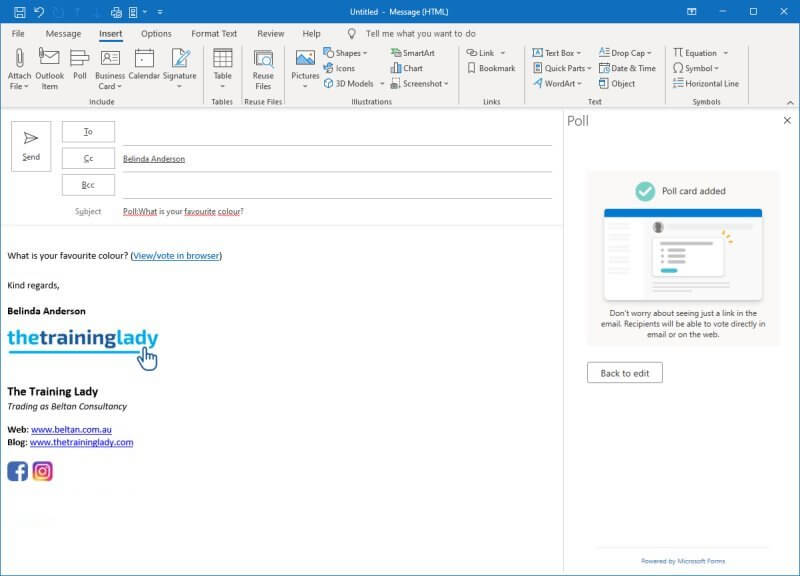
- You will now see that a few things have been added to the email message including a Subject, the question you are asking and a link to view/vote in a web browser. You will also notice that you have been added into the CC field of the email as well.
- Go ahead and address the email as normal, make any changes you need and then go ahead and click Send.
Responding to a poll in Outlook
- Open the email.
- Click the link to vote.
- Your default web browser will open and display the question and answers.
- Make your selection:
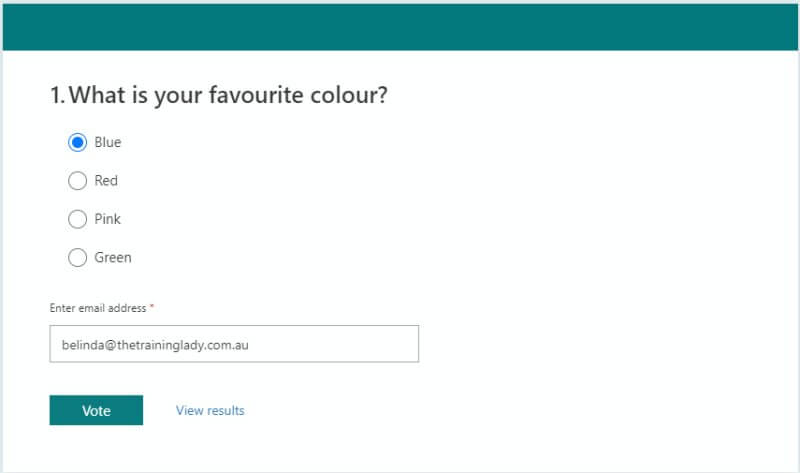
- Your email address should automatically appear in the Enter email address field.
- Click Vote.
- The results will now be displayed so that the respondant can see what others have responded with although cannot see exactly who voted for a specific answer.
View poll results
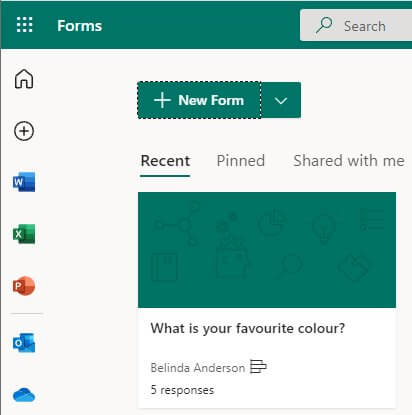
- Go to the Forms website or access Microsoft Forms via the Office Portal.
- You should see the poll listed showing the question as the name of the form and it will display the poll icon along with how many responses it has received so far.
- Click the poll to view the results:
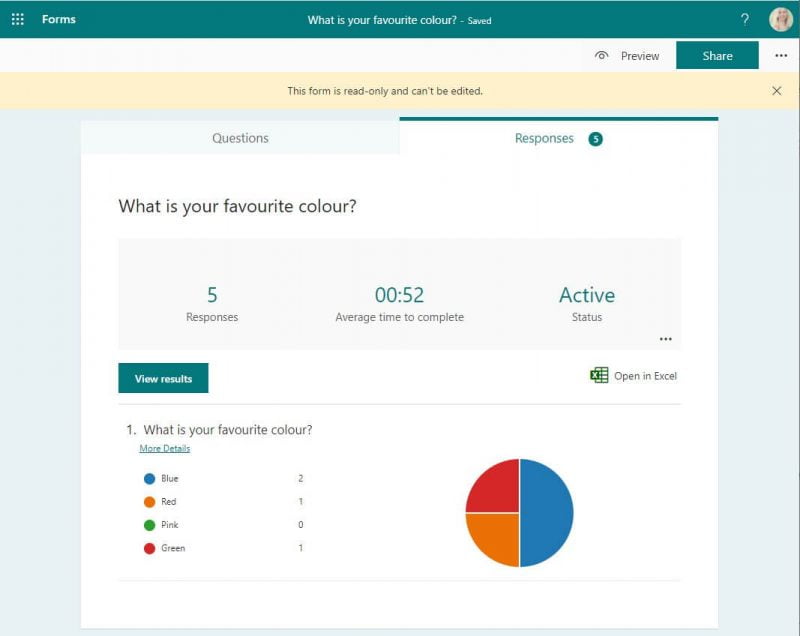
- You will now see the Questions tab and the Responses tab visible.
- Click the Responses tab to view the results.

- The results will now be displayed along with average time to complete, and a pie chart displaying the results.
Congratulations, you’ve created a poll using Microsoft Forms in Outlook. Don’t you love when all these great tools integrate with each other to create amazing tools.
Feel free to leave any questions below.


2 Responses
Hello! When I do this, the poll is always stuck at the top above the message text that explains why I’m sending a poll. Is there a way for the poll in the email to be placed in the middle of the message? Thank you!
I want to disable the Poll button in outlook. Do you know how to do that?