Microsoft Forms is a great program which allows you to create interactive forms including surveys, quizzes, evaluations and much more. Once you have created the form, you are going to need to share that form with others. Those people may be located within your organisation or be an external party. Let’s explore the options on how to share your Microsoft Form with others.
Create your Form
If you have not created a form using Microsoft Forms before, see these articles to get you started: Microsoft Forms.
For my example, I have a simple Teacher Satisfaction Survey that I would like to send out to all staff.
Share a form within your organisation
When sharing a form within your organisation, all responses will be identifiable as each user will need to log in with their Microsoft 365 account. Their details are then recorded along with their responses. When you view the responses received, you will be able to see the name of the respondent. Now it’s time to share your form so that you can begin receiving responses.
- Open Microsoft Forms
- Log in with your Microsoft 365 username and password
- From the Forms screen click on the form you wish to share
- With the form visible, click the Share button

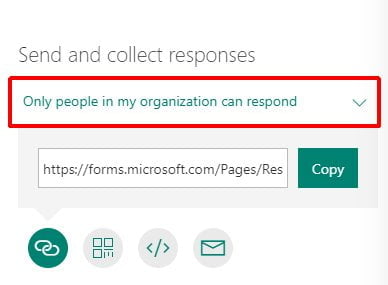
- Because we are sharing within our organisation, ensure the option is selected as Only people in my organization can respond
- Now we want to send the link out to those who we would like to share the form with. You have a few sharing options available. You can share via: Link, QR code, Embed, or Email. See the following sections to see how you can share using each of these methods.
Share a form outside of your organisation
If you wish to have your form completed by people outside of your Microsoft 365 organisation, you will need to allow this access within the Form itself. By default, all forms provide access only to those within your organisation.
Another point to consider is whether you want all responses to remain anonymous or do you require identifiable information such as name and email address? By default, all forms will be submitted as “anonymous”. If you do require identifiable information, you will need to add fields into your form to collect this information. Add a field for Name and Email and set them as required fields so that those completing your form must enter something. This will then be visible when viewing responses.
Let’s look at how to share your form with people outside of your organisation.
- Open Microsoft Forms
- Log in with your Microsoft 365 username and password
- From the Forms screen click on the form you wish to share
- With the form visible, click the Share button
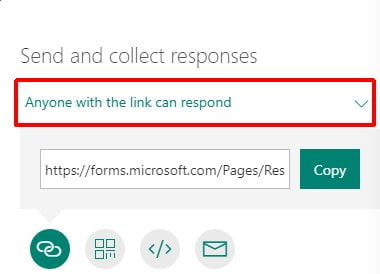
- Because we are sharing outside of our organisation, change the option to Anyone with the link can respond
- Now you can send the link out to those who we would like to share the form with. You will have the same sharing options available as if you were to share only within your own organisation. You can share via: Link, QR code, Embed, or Email. See the following sections to see how you can share using each of these methods.
Share using a Link
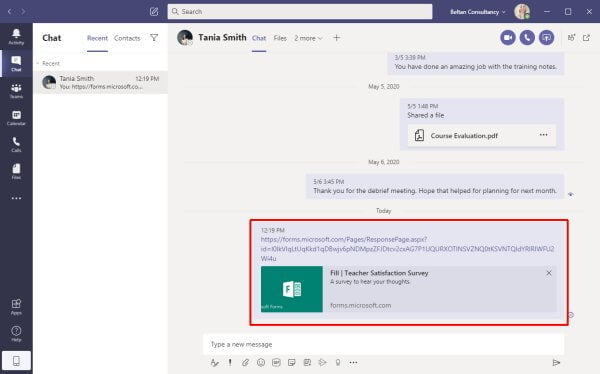
Sharing your form using a link is possibly the easiest option. You can copy and paste the link into any number of different platforms giving those people direct click access to your form online. You can paste the link into an email thread, into a Microsoft Teams chat or channel, into a share OneNote page or directly online. This gives great versatility for sharing your form with others.
The Copy button adjacent to the actual link text is the same as clicking the Link share button.
- From the Share screen click the Link button
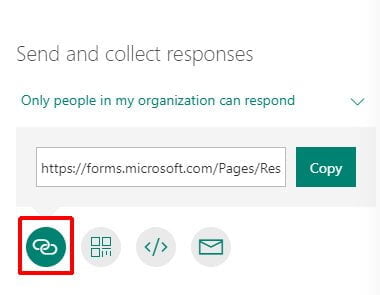
- This is actually the same process as if you were to click the Copy button
- Open up your chosen application or medium you will share the link with
- Paste the link using the right mouse click > Paste or Ctrl + V on the keyboard
- I have pasted the link into a chat within Microsoft Teams
Share using a QR code
A QR code is similar to a bar code we find on products we buy at the shops but provides users with a link to a website address. In our case, our QR code can be used by staff or students and provide them with a direct link to our shared Microsoft Form. The QR code is a great option if you have multiple users who require access to your form on a broad basis. A prime example is if I am presenting at a conference and want to provide a link to my form. I don’t have everyone’s email address, I also don’t want to have to individually send the link to people, so instead, I can display the QR code during my presentation and have everyone scan the code with their smartphone camera, which will read the QR code and direct them immediately to the form which they can complete.
- From the Share screen click the QR code button
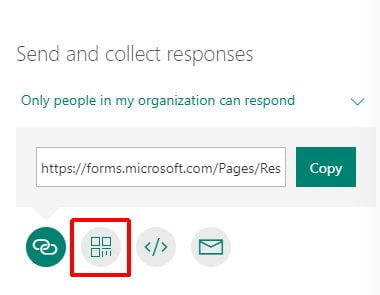
- You will now be prompted to download the QR code image
- Click the Download button
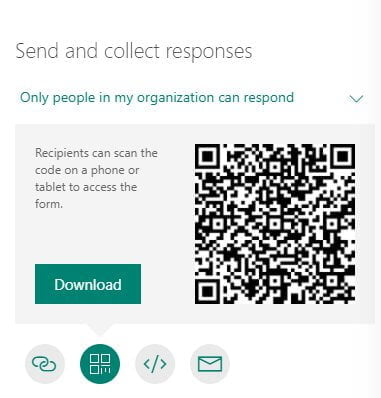
- Your browser should now download a .PNG file which is just an image file
- You can now insert the QR code image file into your chose platform including an email message, a Microsoft PowerPoint presentation, or a shared OneNote Notebook.
- Those you wish to use the QR code should then open the Camera app on their phone and point it at the QR code. They will be prompted to open microsoft.com in their web browser app which will direct them to your form
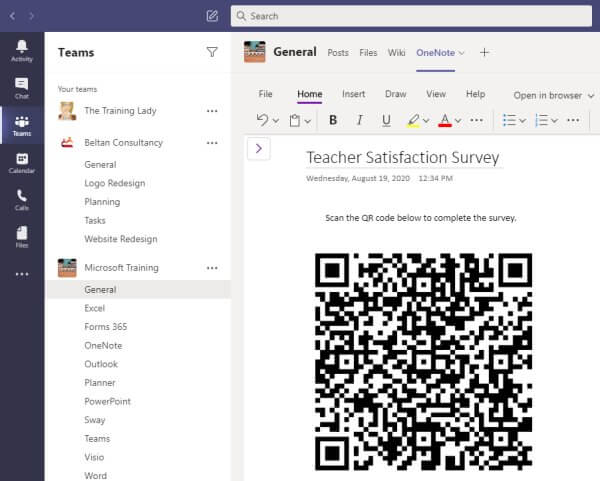
Try this yourself: grab out your smartphone and open the Camera app. Aim the camera at the QR code above to see your phone read the code and prompt you to open the microsoft.com website link.
- In my example, I have added the QR code to my OneNote Notebook via Microsoft Teams
Share using Embed code
Microsoft Forms provides you with a code snippet which can be used to embed the form into a website page. I have used this a few times to provide access to my Forms as part of my articles. The embed code consists of an IFRAME HTML tag which can be used to place the form onto any website. You can also use the embed code to add your Form into a Microsoft Sway.
- From the Share screen click the Embed button

- The Embed code will be displayed and begins with <iframe
- Click the Copy button
- You can now paste this code into a website page or into a Microsoft Sway. I have pasted the code into this web page below so you can see the end result.
- If you have not worked with web pages before you may need to do a little research on this. All embed codes are HTML code and need to be placed into the Text HTML version of a web page
Share via Email
A quick option to share your form is using the Email option. This will automatically create a new email message, using Microsoft Outlook and add the link to the email. You then add the email addresses you wish to send it to and click Send. Very simple and effective.
- From the Share screen click the Email button

- A new email message will be created ready for you to complete the necessary information
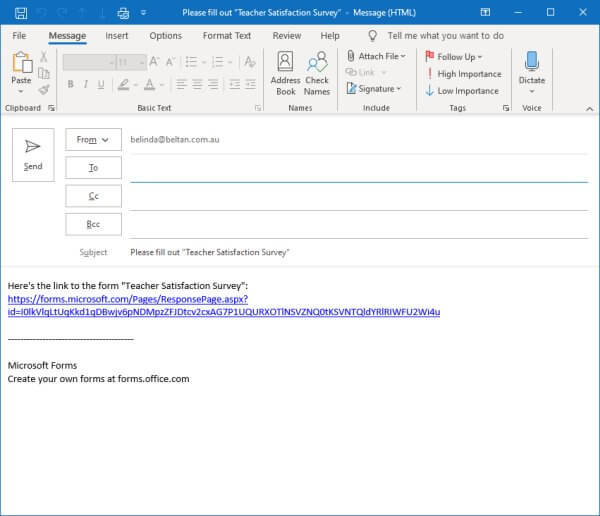
- Complete the To field and make any changes you wish to the Subject and message body
- Click Send
Add a Form to Microsoft Teams
The last option here, which is not shown in the Share screen is the ability to add a Form into Microsoft Teams. Rather than adding a link via your Teams channels, you can directly add the Form in as a tab within the channel. This gives all members of the Team direct access to the entire form without needing to go into the Teams interface to complete it. This is very useful and streamlines the process for completing a form.
- Open Microsoft Teams
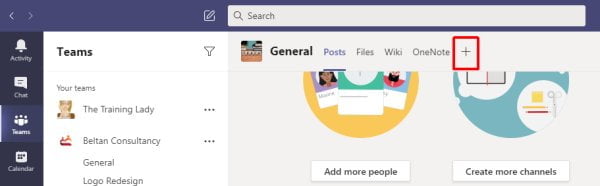
- Go into the Team then channel you wish to add the Form to
- Click the + Add a tab button
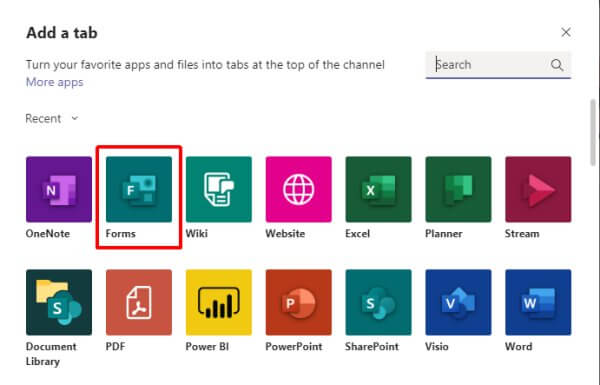
- From the Add a tab screen, select Forms
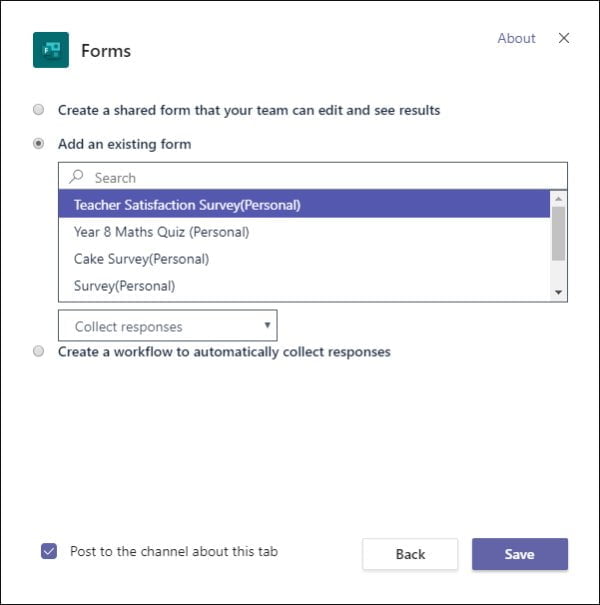
- From the list select Add an existing form
- You should see the form in the list, select it and click Save
- The Form will now be added as a tab in the channel
I hope this has given you a great overview of the different ways you can share your Microsoft Forms with others. Comment below with any questions.