Microsoft Outlook offers numerous features to help you manage your inbox efficiently. Among its many functionalities, Search Folders are a valuable tool to streamline your email. Search Folders in Outlook allow you to gather specific emails from various folders across your mailbox and present them in a single virtual folder, saving you time and effort when locating important messages.
Search Folders help you save time by automatically gathering emails that meet certain criteria. Instead of manually searching for emails that fit specific criteria each time, you can instantly access the content with a single click.
An added bonus is that Search Folders are dynamic, meaning they automatically update as new emails arrive or existing emails meet the specified criteria. This ensures that your folder content automatically remains current.
Create Search Folders in Outlook
For this example I want to create a Search Folder that will display any emails in my Inbox from a specific person. Let’s get started and create a new search folder:
- Open Microsoft Outlook
- Select the Folder tab from the Ribbon.
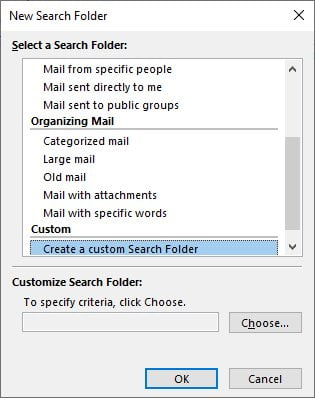
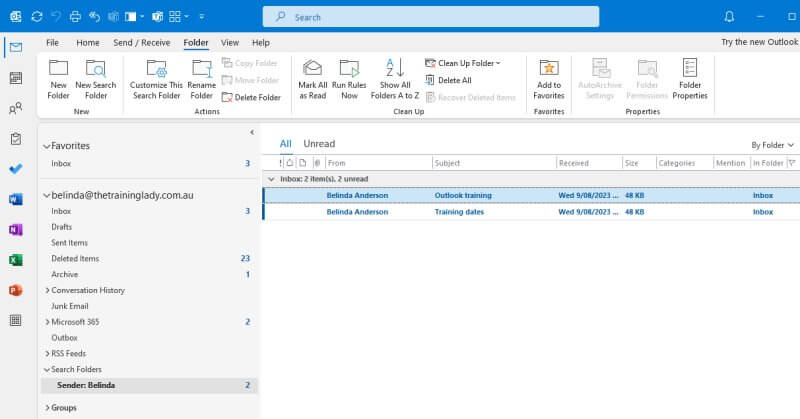
- Click the New Search Folder button:

- The New Search Folder dialog box will appear, giving you several predefined templates. Some examples include options such as Unread Mail, Categorized Mail, Mail sent directly to me, Large mail, or you can create a custom search folder based on your specific criteria.
- In this example I will create a Search Folder to show me any email in my Inbox from a specific person. I will need to create my own custom search folder to achieve this.
- Choose Create a custom Search Folder:
- Now we need to specify who the people are that we want to be included in this Search Folder results.
- Click the Choose button.
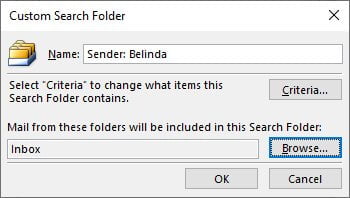
- The Custom Search Folder dialog box will appear:

- Add a name for the custom Search Folder.
- Now we need to specify the criteria, click the Criteria button.
- The Search Folder Criteria dialog will appear:

- Click in the From button to display the Address List and add senders from your address book. You can also type in the email address directly to the From field. If you wish to add multiple people simply separate the email addresses with a comma (,).
- Click OK to complete the criteria set up.
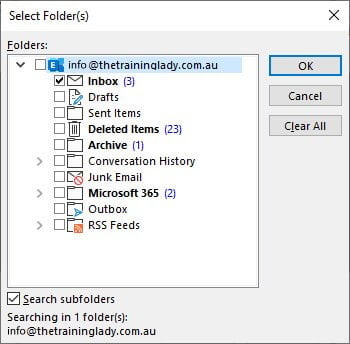
- By default the search folder will display content from the specified senders from ANY folder within your mailbox. We want to specify that we only see emails from the sender from the Inbox. Click the Browse button and select the Inbox.
- Click OK.
- You will now see the details of the custom search folder, click OK to finish x 2.
- The new Search Folder will now appear in the Search Folders folder.
- You have now created a Search Folder in Microsoft Outlook.
- The Search Folder will automatically update and gather emails based on the criteria you set, ensuring you have the most relevant messages readily available.
Modify or Delete Search Folders
At any time, you can modify the criteria of an existing Search Folder or create additional folders to suit your needs.
To edit an existing Search Folder:
- Right mouse click on the Search Folder
- Choose Customize this Search Folder from the menu.
- You will be able to edit the name, criteria and any other specifics of the search folder settings.
If you no longer require a specific Search Folder, you can easily delete it by right-clicking on the folder’s name and selecting Delete.
Creating a Search Folder in Microsoft Outlook is a straightforward process that offers significant benefits in organising and managing your email content. By using this feature, you can effortlessly collect relevant messages from various folders, ensuring essential emails are easily accessible.
I hope you have found this post useful, feel free to comment below with any questions and be sure to check out other great tips on using Microsoft Outlook.