A common issue that arises with many PowerPoint presentations is an inflated file size. It’s too big to email or it’s slowing down the computer during the presentation. So let’s look at how to compress images in PowerPoint to reduce the overall file size.
Considering we are working in a digital world our presentations tend to take on a life on their own and visual elements are a fantastic addition to a presentation. The down side of this is that they inevitably inflate the physical size of the presentation.
If you are the only person who needs to edit and run a presentation then that may not be an issue. But if you need to be able to email a copy of your presentation to anyone, at any stage, then file size is going to impact your ability to do so.
What about the speed at which a presentation is displayed? A large file can have a direct impact on how fast the presentation runs as your computer system. Your computer needs to be able to adequately manage the larger file size therefore using up more processor and more memory to make the presentation run. Larger files can cause a delay in slide transitions or animations and generally make it slow to present to an audience.
A simple way to address file size is by looking at image compression. Image compression is a process which reduces the file size of an image whilst still attempting to maintain the quality of the image. The main goal here is to reduce the physical size that the file will take up of storage. Image compression achieves this by removing data from the image file which is not required for it to be displayed.
Compress an image before inserting in PowerPoint
One option you have is to compress images before you actually insert them into a PowerPoint presentation. This is a very effective method and I personally use this for each and every image I upload to this website so this technique is not just something related to PowerPoint.
There are many free image compression tools online, I personally use one called TinyJPG. The TinyJPG tool allows you to compress JPG, JPEG, PNG and WebP formatted images. You upload the original image and then it allows you to download a newly compressed and optimised version.
Even if you compress all images before you insert them into your PowerPoint presentation, you may still find that utilising the built-in Compress Pictures feature has a positive impact on your file sizes so it it worthwhile using both techniques.
Using the Compress Picture feature
Now we want to specifically look at the Compress Picture feature. This is available in all Microsoft programs whenever you insert a picture, so be sure to utilise this in Word, OneNote etc.
When using the Compress Pictures feature you are provided with a few options in terms of what the compression will be applied to and what resolution you wish to compress to. The options include compressing only the selected image, and also whether you want to delete any cropped areas from a picture. Now to explain that last one a little better.
When you crop an image, you remove a portion of the image from being displayed. By default all of the Microsoft programs simply hide the cropped area which is very useful if you want to display it again later. You can simply go back into the crop tool and undo the crop. This does however mean that technically the original image in it’s entirety is being loaded into the file. The Compress Picture feature allows you remove those cropped areas which therefore has an impact on the file size for the picture.
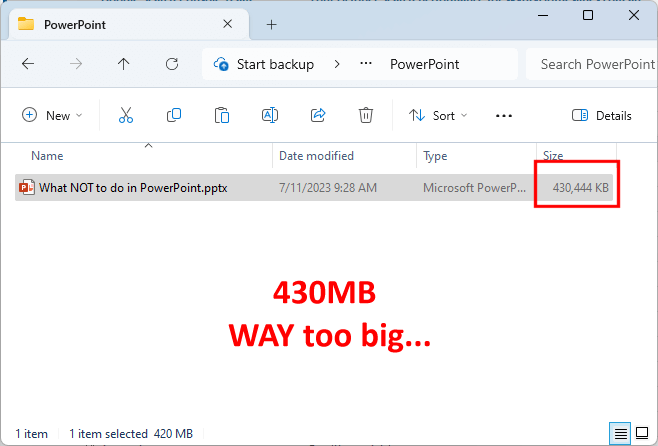
How much did the file reduce in size?
If you want to see how much your presentation will reduce in size, you will need to take a few steps to check this manually. PowerPoint does not give you a summary of this after you have compressed the images.
BEFORE you compress pictures:
- Open the file you wish to compress the pictures within.
- Click the File tab and select the Info option.
- On the right hand side you will see the file Properties.
- Note the Size information.
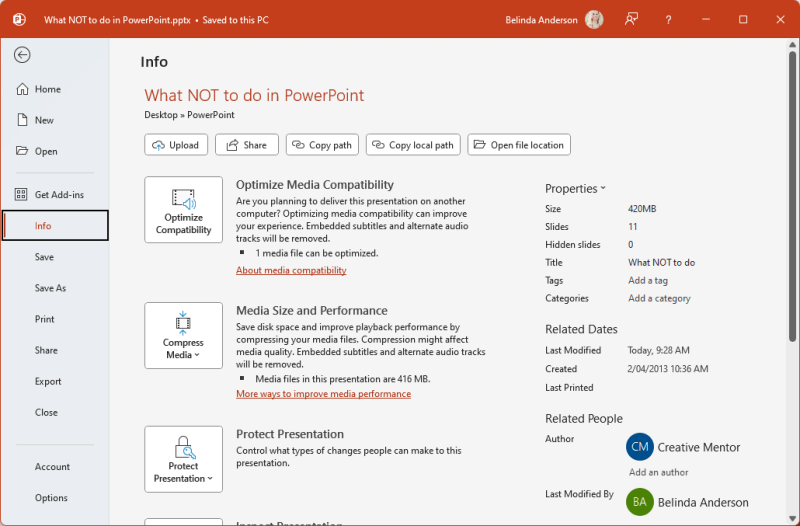
- Go ahead and complete the Compress Pictures function as shown below.
- Save the file.
- Go back to the File tab and select the Info option again.
- Now compare the Size information to see how much your file has been reduced in size.
Compress Pictures in PowerPoint
Let’s now have a look at how to use the Compress Picture feature for a new presentation:
- Open an existing PowerPoint presentation which contains images, or create a new blank presentation and insert several images.
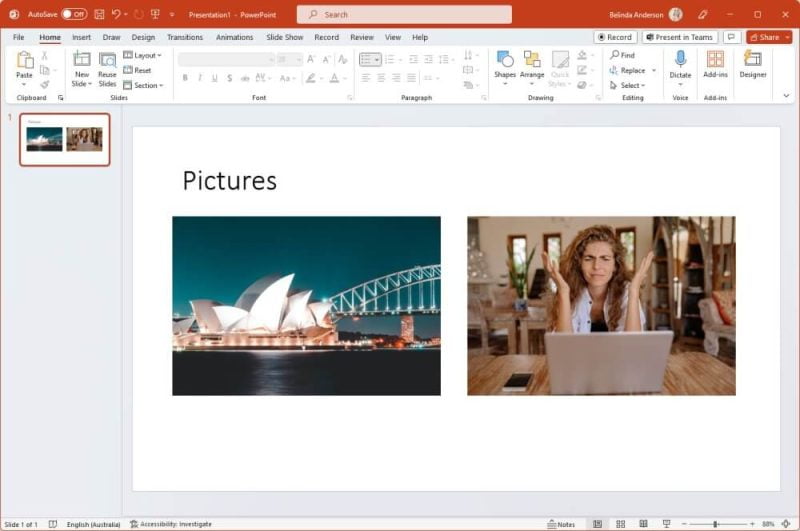
- Click to select one of the pictures.
- Select the Picture Format tab which is now available.
- Now click the Compress Pictures button.

- The Compress Pictures dialog box will appear:

- From the Compression options section you will see that both settings are enabled. This means that the compression settings will only be applied to the current image and secondly that any cropped areas of the selected image will be deleted.
- If you only want to compress the current image you have selected, leave the Apply only to this picture ticked. If however you want to compress ALL images in your presentation in one go, untick this option.
- Next let’s choose which Resolution we wish to compress the image/s to. Have a look through the resolution options and decide which one best suits how you will be using your presentation in the future. For this example I am going to choose the Print resolution.
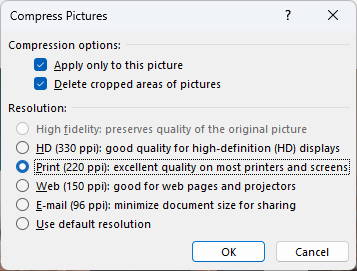
- Now click OK.
- Depending on which option you chose, either the current image, or all images in your presentation will now be compressed. Unfortunately PowerPoint doesn’t give you any message to say the compression has been completed.
Which image format to use
Another consideration when creating a PowerPoint presentation, is the image file format you use. Some of the popular image file formats include JPG/JPEG and PNG and both will affect the size of your presentation.
Generally JPG/JPEG image formats will provide great quality images but at a lower file size due to the way the image format will compress. PNG file formats are generally very high quality and specifically useful when working with transparent backgrounds or images which contain text however are usually a larger file size than JPG.
If an image is purely photography based such as a landscape or portrait, then JPG/JPEG format is perfect.
If an image contains a transparent background section OR has text print within the image, then PNG is the best option.

Use .JPG/JPEG Format
Use .PNG
That’s a wrap
I hope this helps to reduce the file size of your PowerPoint presentation and explains a little about image compression. Be sure to comment below with any questions or subscribe to our RSS feed to be updated when new content is added.