

Wondering how to convert a document from Word to PDF format? Well many moons ago, Microsoft added this feature directly into the Microsoft products and lots of people didn’t notice and still haven’t. Whilst there are lots of programs on the web that provide this feature, why not use what you’ve already got and have one less thing you need to install on your computer. So let’s look at the simple process of converting a document from Word to PDF.
Also worth noting is that we are talking specifically about Word to PDF however, you can convert any Microsoft document format to PDF format. This includes an Excel worksheet, PowerPoint presentation, Publisher document, and a Visio drawing – see my earlier post here. Anywhere you can use the Save As function, you can convert to a PDF file.
Convert from Word to PDF
- Open Microsoft Word
- Open an existing document which you wish to convert from Word to PDF format
- All you need to do now is use the Save As function
- Click the File tab and select Save As OR press F12 on the keyboard
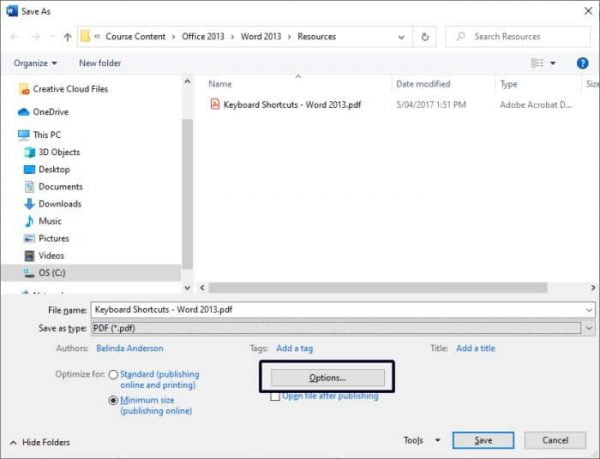
- The Save As dialog box will appear:
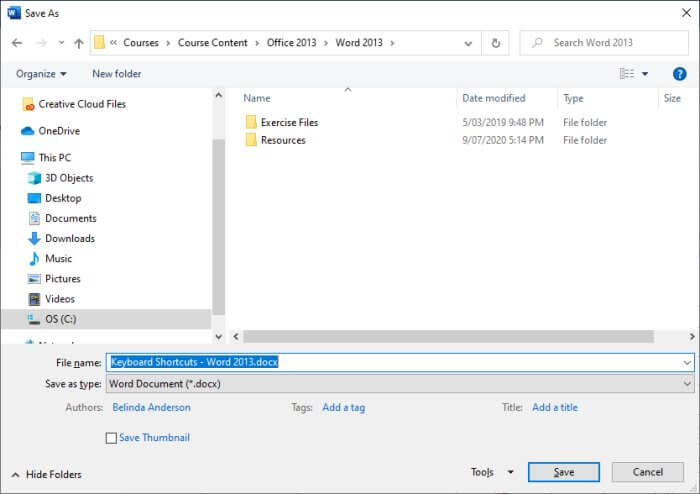
- Enter a new File name if needed and select the location you wish to save the PDF file to
- Now click the Save as type drop-down menu and choose PDF (*.pdf) from the list
- Click Save
- Open File Explorer (Windows + E on the keyboard) and navigate to the location you saved the PDF file
- Double click to check the file formatting all looks ok.
Compress file size
If you have converted your file to PDF format but you find the file size is too large, you may need to make a few changes to optimise for a smaller file size. This is particularly useful if your Word document has a large number of images/photos which will increase the overall file size of the document and also create a larger size PDF file.
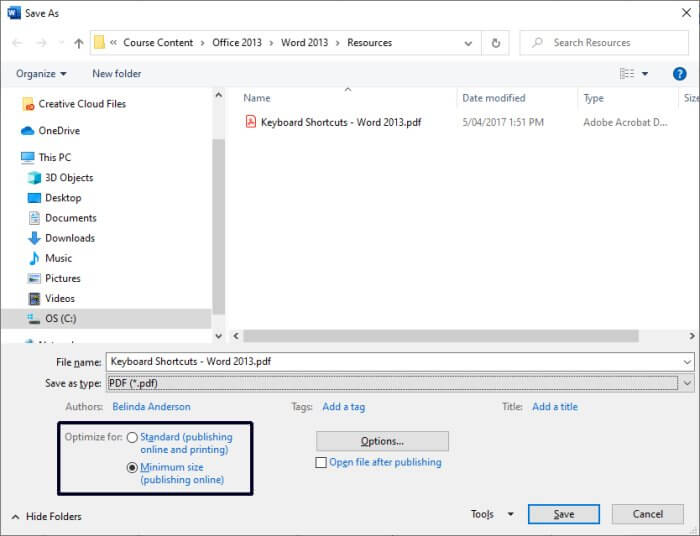
By default, Microsoft Word has two optimisation options when saving as PDF: Standard (publishing online and printing) and Minimum size (publishing online).
To use the Minimum size option:
- Repeat the process above to display the Save As dialog box
- Change the Save as type drop-down to PDF (*.PDF)
- From the Save As window, select the Minimum size option as shown below:
- Ensure your File name and location to save file are correct, then click Save
PDF/A compliant document
PDF/A compliant documents is a standardised format used for documents to preserve formatting and disables some features which cannot be archived. See Wikipedia for more information.
It is still therefore possible to create a PDF/A compliant document using any of the Microsoft products.
- Repeat the process above to display the Save As dialog box
- Change the Save as type drop-down to PDF (*.PDF)
- Click the Options button to display more details
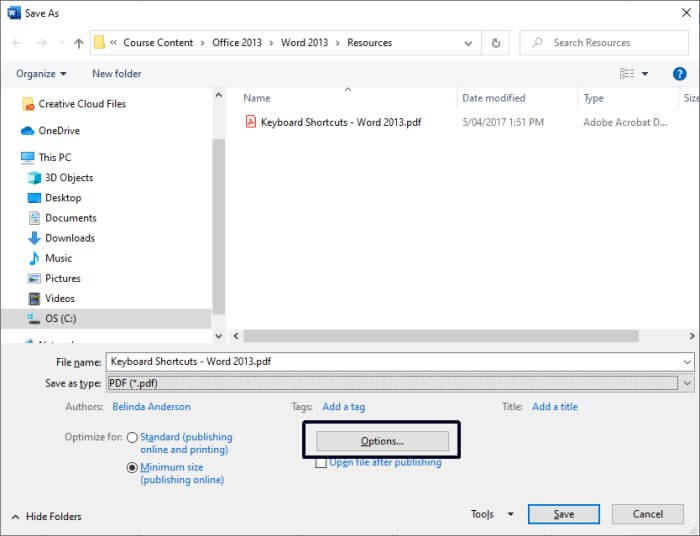
- The Options dialog box will appear with additional settings you can adjust for your PDF file
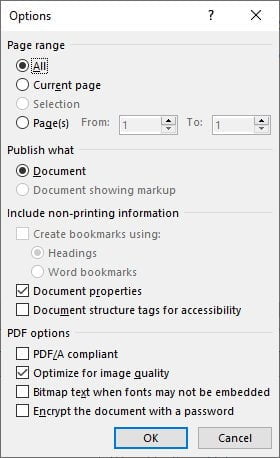
- Tick the option for PDF/A compliant
- Click OK
- Ensure your File name and location to save file are correct, then click Save
- Your PDF file will now be created
Create PDF from specific pages only
What if you have a 20 page Word document but you want to create a PDF from only the first 10 pages? Some users might think they need to create a second copy of the file, remove the pages they don’t need and then convert to PDF. Nope – not necessary.
- Repeat the process above to display the Save As dialog box
- Change the Save as type drop-down to PDF (*.PDF)
- Click the Options button to display more details
- The Options dialog box will appear with additional settings you can adjust for your PDF file
- From the Page range section select Page(s) and set the From and To page numbers
- Click OK
- Ensure your File name and location to save file are correct, then click Save
- Your PDF file will now be created with the specific page range included
I hope this provides some useful tips to have you converting your files to PDF like a pro! Feel free to leave any comments or questions below.


